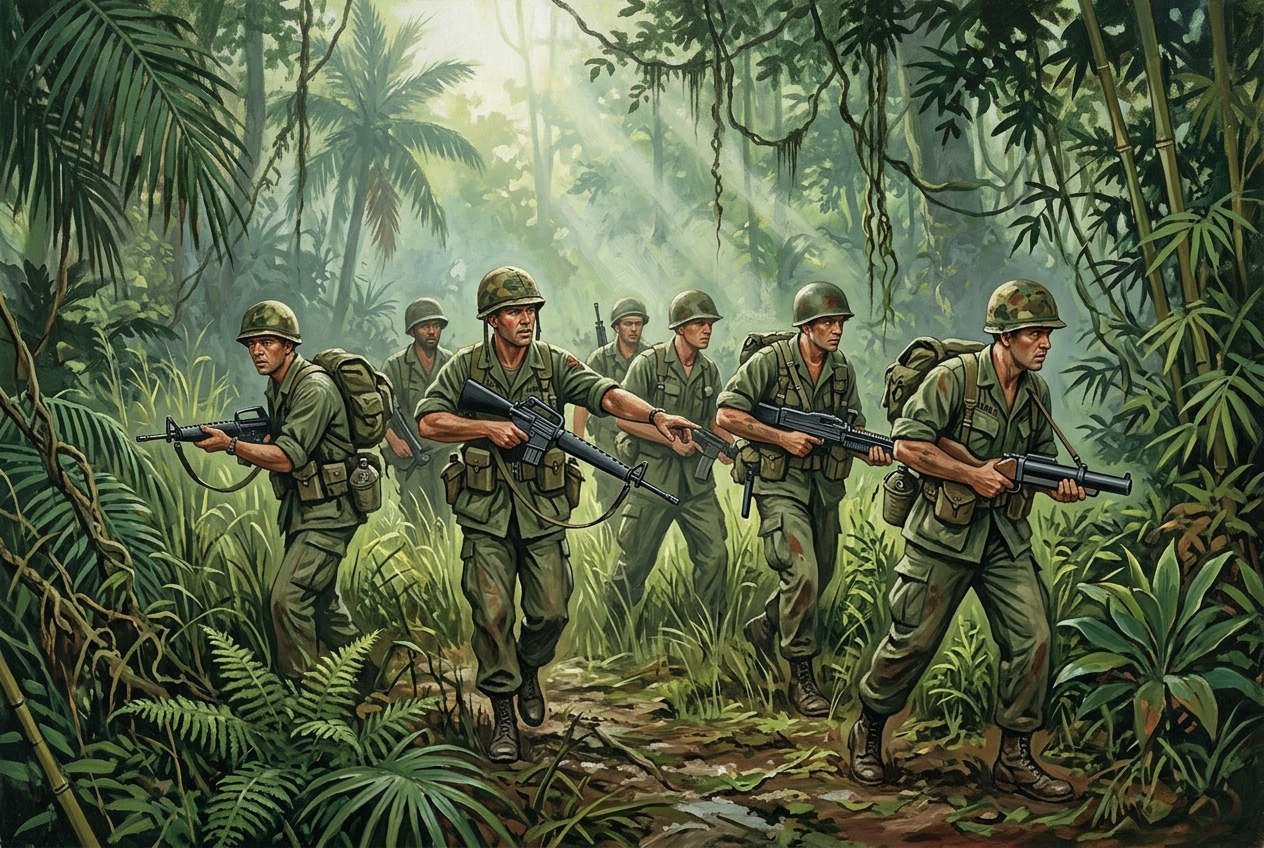
Dinky Dau
The complete small-unit tactical ruleset for Vietnam War platoon and squad-level skirmishes. Featuring asymmetric fog of war, the Green Fog detection system, dynamic command friction, and intense small-arms firefights.
Calculate Target Number (TN) to spot hidden Blinds or Echoes.
Roll multiple D10s simultaneously to resolve small-arms fire and calculate suppression.
Resolve heavy weapons firing against vehicles or bunkers (1D6 + Pen vs AV).
Roll scatter direction and drift distance for mortars and air support.
Automate Insurgent Shadow Blind behavior when triggered.
Generate random encounters when a US unit triggers an unknown blind.
Chapter 1: Introduction, Basing & Core Concepts
1. Ground and Time Scale
Dinky Dau is calibrated for 15mm miniatures (1:100 scale).
- Ground Scale: 1 inch = 10 meters.
- A standard 4' × 4' table represents a sector roughly 480m x 480m (ideal for a reinforced rifle platoon patrol, LZ landing, or village sweep).
- A 6' × 4' table represents 720m x 480m (ideal for multi-platoon / company operations with armor and riverine craft).
- Time Scale: 1 Game Turn represents approximately 2 to 3 minutes of real-world tactical time during intense firefights.
- Game Duration: A standard convention game runs 5 to 7 Game Turns, completing easily within 2.5 to 3 hours.
2. Basing Architecture: Pre-Established 15mm Standards
To ensure players do not need to buy or rebase their collections, Dinky Dau directly adopts the standard basing conventions popularized across commercial 15mm tabletop systems:
| Base Type | Typical Dimensions | Miniatures per Stand | Tactical Unit Represented | Notes |
|---|---|---|---|---|
| Medium Stand | ~50mm wide × 32mm deep | 4 to 5 figures | Rifle Fireteam / Cell | Standard infantry maneuver element. 2 medium stands usually form a full 8–10 man squad. |
| Small Stand | ~32mm wide × 25mm deep | 2 to 3 figures | HQ / Specialists | Platoon Leader, Squad Leader + RTO, Sniper, or Medic. |
| Weapons Stand | ~50mm wide × 32mm deep (or 40mm round) | 2 to 3 figures + Weapon | Crew-Served Weapon | Tripod M60, 60mm/81mm Mortar, Soviet DShK HMG, RPG team. |
| Vehicles & Armor | Model hull on base or unbased | 1 Vehicle Model | 1 Tank / APC / Boat / Chopper | M113 ACAV, M48 Patton, PBR, Tango boat, UH-1 Slick. |
[!NOTE] No Sabots Required! You do not need magnetized sabot trays with removable individual figures. Bases are moved as single, durable gaming pieces. Figure losses and suppression are handled cleanly using markers and casualty rings.
3. Hit, Wound & Durability Tracking by Stand Type
Because individual figures are fixed to their bases, unit degradation is tracked using simple, visual on-table tokens:
| Stand / Unit Type | Hit Points (Durability) | Damage Tracking Method | Tactical Behavior |
|---|---|---|---|
| Standard Infantry (Medium Stand) | 2 | 1 Hit = Red Casualty Ring (Half Firepower) 2 Hits = Eliminated (drops Casualty Marker) |
Core rifle fireteams, guerrilla assault cells. |
| Command / Specialist (Small Stand) | 1 | 1 Hit = Eliminated or Wounded | Leaders, RTOs, Corpsmen/Medics, Snipers. Fragile high-value assets. |
| Crew-Served Weapon (Weapons Stand) | 2 | 1 Hit = Red Ring (Half Firepower) 2 Hits = Gun knocked out & crew eliminated |
M60 tripod, 60mm mortar, Soviet DShK, RPG team. |
| Fortified Bunker / Spider Nest | 3 | Tracked with D6 counter (3 -> 2 -> 1) | Requires satchel charges, LAW/RPG, or 105mm artillery. Immune to small-arms suppression. |
| Light Vehicle (Jeep, Gun Truck) | 2 | 1 Hit = Damaged/Immobilized; 2 Hits = Destroyed | Thin-skinned mobility assets. |
| Armored Hull (M113 ACAV, Tango Boat) | 3 | 1 Hit = Damaged (-2" move); 2 Hits = Gun knocked out; 3 Hits = Wrecked/Sunk | Protected vs small arms; vulnerable to RPGs and mines. |
| Medium Tank (M48 Patton, Centurion) | 4 | Tracked on hull sheet (4 Hull Points) | Heavy breakthrough armor. |
4. Stand Spacing, Squad Coherency & Base Dimensions
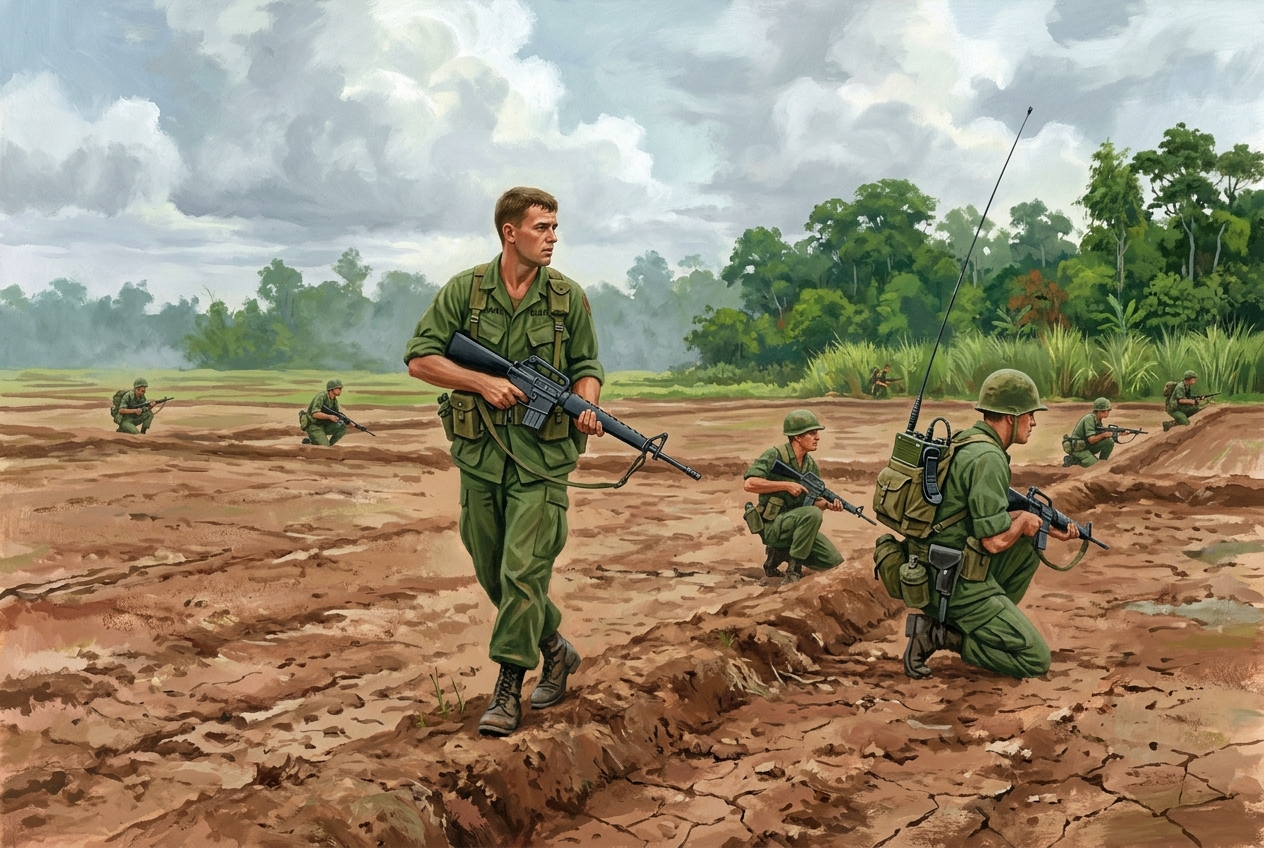
Recommended Team Base Dimensions: - Medium Bases: approx 50mm wide x 32mm deep (approx 2" x 1.25"). - Small Bases: approx 32mm wide x 25mm deep (approx 1.25" x 1").
Coherency & Spacing Rules:
- The 2-Inch Coherency Rule: All stands in a squad must remain within 2" of at least one other stand of their squad.
- Blast Template Danger: If stands are bunched closer than 1" apart, a single explosive template (like a 60mm/81mm mortar or RPG blast) can cover multiple stands. Maintaining historical 1" to 2" dispersion protects troops from area-effect weapons!
5. Jungle Command & Control (C2) Radius
In the claustrophobic confines of Vietnam, maintaining command cohesion was paramount. Leaders had to shout over diesel engines, rotor wash, and incoming mortar fire while peering through dense vegetation.
Measuring Command Radius:
- Who Projects Command? The Platoon Commander (or active HQ element stand) projects the command radius.
- Who Counts as "In Command"? A subordinate tactical element (a full rifle squad consisting of two fireteam stands, an attached machine gun crew, or a vehicle) is considered In Command if at least one stand of that element is within command radius of the Platoon Commander, provided the squad's stands maintain internal squad coherency (stands within 2" of each other).
- Detached & Specialist Teams: Independent sniper teams, detached fireteams operating away from their parent squad, or solo medics must measure command distance directly to their own stand.
Command Distance Thresholds:
| Environment / Condition | Command Range | Tactical Requirement |
|---|---|---|
| Open Ground / Roads / Trails | 6 Inches | Measured from Commander to nearest stand of the squad with clear sightlines. |
| Dense Jungle / Bamboo / Buildings | 4 Inches | Used whenever foliage, canopy, or structures obstruct direct visual Line of Sight. |
| Operational Radio Net (RTO) | Board-Wide | If the Commander has an active RTO stand within coherency, and the squad is equipped with a radio link, they remain In Command anywhere on the board until the radio is damaged or jammed. |
Out of Command (OOC) Friction:
When an element moves beyond command range (greater than 6" in the open, or greater than 4" in dense terrain) without an active radio link, command delays take over:
- Standard Order Surcharge (2 CP): Activating an Out of Command squad normally costs 2 Command Points (CP) instead of 1 CP. This represents runner delays, hand-signal confusion, and hesitation.
- Emergency Initiative Check (1 CP): If the player only has 1 CP available (or chooses not to spend 2 CP), they may spend 1 CP and roll an immediate Morale Test (4+):
- Success (4–6): The Squad Leader exercises local tactical initiative. The squad activates and performs its actions normally.
- Failure (1–3): Friction takes over. The squad hesitates in the green fog and may only Hold Position / Hunker Down (they may return defensive fire or spot, but cannot advance or declare assaults this impulse).
6. Required Game Markers & Tokens
To make conventions run effortlessly, prepare a small set of standard markers:
| Marker Name | Physical Representation | Game Function |
|---|---|---|
| Marker Name | Physical Representation | Game Function |
| :--- | :--- | :--- |
| Blind Marker | 25mm-30mm cardboard/acrylic disc with hidden letter/number on underside | Represents unspotted enemy movements or patrols in the jungle. Some are Dummies. |
| Echo Marker | Green question mark chit or audio ping icon | Placed when movement or sound is detected, but before visual Positive ID (PID). |
| Overwatch Marker | Reticle / crosshairs chit placed next to a stand | Stand holds a 90° arc to execute reaction Opportunity Fire during an enemy impulse. |
| Suppression Token | Small yellow beads, micro-dice, or bullet-burst chits | Tracks incoming fire volume, mortar concussion, and tripwire blast pressure. Each token imposes -1 to Spotting rolls and -1 to Firefight dice pools. Taking 2+ tokens (militia) or 3+ tokens (regulars) immediately forces a Pinned state. Cleared via Rally actions. |
| Pinned Marker | Orange or red burst marker ("Hugging Dirt") | Stand is fully pinned down under critical suppression; cannot advance toward enemy; movement speed halved; loses Overwatch; -1 to firing dice. Must spend CP/AP to Rally. |
| Casualty Ring | Red rubber ring / colored 3D skull placed over a figure | Stand has suffered 1 casualty; operates at degraded combat strength (Half Firepower). |
| Smoke Marker | Cotton ball or purple/red/yellow/white smoke plume | Blocks Line of Sight or marks Landing Zones (LZ) for Dustoff/Airstrike. |
| Low Ammo Marker | Bullet casing or ammo box chit | Stand fired on full cyclic rate or conducted Recon by Fire; cannot lay down suppression until resupplied. |
Chapter 2: Turn Sequence & Activation
Conventional IGOUGO ("I-Go-You-Go") fails in the Vietnam theater because it robs the insurgent player of surprise ambushes. At the same time, overly complex card decks or infinite reaction chains can grind convention tables to a halt.
Dinky Dau uses a Momentum & Ambush Impulse Engine.
1. Turn Structure Overview
Each Game Turn consists of three sequential tactical phases:
| Phase | Phase Name | Core Tabletop Activities |
|---|---|---|
| Phase 1 | The Tension Phase | Advance fire support flight clocks; the Insurgent player generates Ambush Tokens; the Conventional player rolls and pools Command Points (CP). |
| Phase 2 | The Engagement Impulses | Alternating tactical activations. Players activate one Squad or Support Element at a time. The defending player may spend Ambush Tokens to spring sudden reactions or point-blank ambushes. Continues until both sides pass or exhaust CP. |
| Phase 3 | Consolidation & The Fade | Perform casualty triage and Buddy Aid; resolve medical Dustoff extractions; unsuppressed insurgents execute "The Fade" back into tunnel networks or revert to hidden Blinds; clear Pinned markers and advance the turn counter. |
2. Phase 1: The Tension Phase
- Fire Support Clocks:
- Advance any pending off-board Artillery or Airstrike countdowns by 1 (see Chapter 7). If the clock hits 0, the strike impacts this turn!
- Resource Generation:
- Conventional Player (Command Points - CP):
- Roll 1D6 per active Officer / Platoon Leader stand.
- Add +1 CP if an operational RTO (Radio Operator) is in base contact with the Commander.
- Add +1 CP per surviving Squad Leader stand.
- Total CP represents the pool of orders the player can issue this turn.
- Insurgent Player (Ambush Tokens):
- Gains a baseline number of Ambush Tokens per turn (typically 2 to 3, depending on the scenario and intact tunnel entrances).
3. Phase 2: The Engagement Impulses
Players alternate activating one Tactical Element at a time (a Squad of 2–3 stands, or a vehicle/gun team):
Conventional Actions (Command & Control Cost)
When activating an element, the player spends Command Points (CP) to issue an order: * Standard Cost (In Command): 1 CP per action if the squad is within the Platoon Commander's Command Radius (6" in open/trails; 4" in dense triple-canopy/bamboo) OR in operational radio contact via an active RTO. * The "Out of Command" (OOC) Surcharge: If the squad is beyond command radius with no radio link, it costs 2 CP to activate (representing courier delays, obscured signals, and static). If the player only spends 1 CP, the squad must pass a Morale Test (4+) to act; on a failure, it must hold position.
Available Actions:
- Patrol Move: Move up to 6" (cautious, +1 to Spotting rolls).
- Trail Rush: Move up to 8" along clear tracks/roads (vulnerable to ambush enfilade).
- Sprint / Rush: Move up to 9" (cannot fire, counts as making noise; immediately reveals unit if near Blinds).
- Aimed Fire: Fire with full dice pool against a confirmed target.
- Fire & Maneuver: Move 4" and fire with half dice pool.
- Set Overwatch ("Sights on Sector"): Do not move or fire; place an Overwatch Marker and declare a 90^\circ forward arc or terrain corridor to enable reaction Opportunity Fire during the enemy's impulse.
- Recon by Fire: Spray an Echo marker (consumes ammo, risks friendly fire).
- Search / Pacify: Search a hootch, paddy cache, or spider hole within 2".
- Rally / Buddy Aid: Remove 1 Pinned marker, or stabilize a wounded stand.
The Conventional Reaction: "Opportunity Fire" (Resolving Overwatch)
When a squad or heavy weapon team holds an Overwatch Marker, it monitors a designated killing zone:
- Trigger Condition: During an enemy impulse, if an opposing unit (or unrevealed Blind moving at speed/in the open) crosses the designated overwatch arc within Line of Sight, the player may declare: "OPPORTUNITY FIRE!"
- Interrupt Execution:
- The moving enemy stand is temporarily frozen at the midpoint of its move (or at the moment it enters the open kill zone).
- The overwatch unit fires its full Firepower dice pool immediately.
- Target Visibility Modifiers:
- Fleeting / Running Target in Foliage/Brush: -1 to hit (hits on 5+).
- Target Crossing Open Ground (Paddy, Road, Cleared Trail, Stream): No penalty (standard 4+ to hit).
- Target Saving Throws: The moving target rolls cover saves according to the terrain where it was caught.
- Pinning & Interruption Result:
- If the target takes hits, it tests Morale. If it fails, it receives an orange Pinned Marker and its movement halts immediately in the open! If it passes, it completes the rest of its movement.
- Marker Removal:
- Remove the Overwatch Marker once fired.
- Loss of Sights: If a unit on Overwatch is fired upon and becomes Pinned, its Overwatch Marker is immediately discarded without firing.
The Insurgent Reaction: "The Ambush Interruption"
The signature tactic of the Viet Cong and NVA is the pre-planned kill zone sprung on moving columns:
- Trigger Condition:
- Whenever an Allied element moves within Line of Sight or within 6" of a hidden Insurgent Blind, spider hole, or pre-designated Hot Sector, the Insurgent player may shout: "AMBUSH!"
- Cost & Deployment:
- The Insurgent player expends 1 Ambush Token from their pool.
- The Blind is flipped, or off-board hidden miniatures are deployed directly into cover (within 2" of the ambush marker or tunnel trapdoor).
- The Ambush Volley (Shooting First):
- The moving Allied unit's movement is instantly frozen at the ambush point.
- The ambushing Insurgents shoot FIRST before the moving Allied unit can complete its move or return fire.
- Point-Blank Ferocity (\le 3"): Ambushing weapons gain +1 to hit (hits land on 3+).
- Column Vulnerability: Units caught in road or trail column formation receive no cover save (save on 6 only)!
- Allied Morale Reaction:
- Surviving Allied stands must immediately make an emergency Morale Test (Discipline Check):
- Pass (4+): The Allied squad keeps its head, drops prone behind bunds, and may immediately execute a Desperate Return Fire Volley at -1 to hit!
- Fail (1–3): The squad is thrown into chaos! Place an orange Pinned Marker on the squad. Their activation ends immediately—they cannot finish moving or shoot back this impulse!
4. Phase 3: Consolidation & The "Fade"
- The Bleed & Triage:
- Any untended Wounded stand not in contact with a friendly stand or medic tests for survival (1–2 on 1D6: Becomes KIA; 3+: Clings to life).
- The "Fade" (Breaking Contact):
- The Vietnam guerrilla's superpower was disengaging when outgunned.
- Any Insurgent stand that is not Pinned and not within 4" of an enemy stand may Fade:
- Remove the miniatures from the table.
- Replace them with a Blind Marker on a designated jungle edge or tunnel entrance, or remove them entirely to score survival points.
- End of Turn Cleanup:
- Stands with Pinned markers test Morale to remove the pin.
- Check scenario turn limit (typically 6 turns total).
Chapter 3: Terrain, Visibility & Environmental Effects
In Vietnam, terrain was not just scenery—it was the primary combatant. Extreme vegetation, monsoon mud, river canals, and heat exhaustion dictated every tactical decision.
1. Master Terrain Effects Matrix
This table is the core reference for how all battlefield elements interact with terrain:
| Terrain Type | Infantry Move | Wheeled Vehicle | Tracked / Boat | Spotting Max (LOS) | Spotting Mod | Cover Save | Special Tactical Effects |
|---|---|---|---|---|---|---|---|
| Open Dry Field / Cleared LZ | Standard (6") | Fast (8") | Cross-country (6") | 24 inches | None | None (6 save) | Grazing fire; high vulnerability. |
| Dry Rice Paddy (Earthen Bunds) | Standard (6") | Difficult (4") | Cross-country (6") | 24 inches | None | Light (5+) | Low earthen bunds provide hasty cover for prone troops. |
| Flooded Paddy / Swamp | Difficult (4") | Impassable | Difficult (4") | 24 inches | None | Light (5+) | Exhaustion Hazard: Cannot sprint; mud sticks. |
| Secondary Jungle / Scrub | Standard (6") | Impassable | Difficult (4") | 6 inches | -1 | Medium (5+) | Conceals Blinds; standard skirmish zone. |
| Triple-Canopy Primary Jungle | Difficult (4") | Impassable | Impassable | 3 inches | -2 | Heavy (4+) | Tree bursts on artillery; aircraft cannot see smoke easily. |
| Rubber Plantation | Standard (6") | Standard (8") | Standard (6") | 12" down rows / 4" across | -1 across | Light (5+) | High visibility down tree aisles; great for ambushes. |
| Elephant Grass (6–8 ft high) | Standard (6") | Impassable | Standard (6") | 4 inches | -1 | Medium (5+) | Blocks vehicle gunner vision; highly flammable. |
| Sunken Dirt Trail / Cart Track | Trail Rush (8") | Difficult (4") | Fast (8") | Line of sight down trail | None | None | Ambush Funnel: +1 to hit against units in column file. |
| Paved Road / City Street | Fast (8") | Fast (10") | Fast (8") | Unrestricted along street | None | None (Open) | Armor speedway; deadly kill zones for snipers. |
| Waterway / Canal (Deep) | Difficult (4") on foot | Impassable | Boats (10") | Full along water corridor | None | None on water | Chest-deep crossing; riverbanks provide medium cover. |
| Village Hamlet (Thatch / Bamboo) | Standard (6") | Impassable | Crushes hootch (4") | 3 inches inside / blocks through | -1 | Medium (5+) | Flammable (ignited by HE/Napalm); search for caches. |
| Village Outbuilding / Wooden Shed | Standard (6") | Impassable | Crushes shed | Blocks LOS through | -1 | Medium (5+) | Provides light storage / cache concealment. |
| City Masonry / Stone Building (Hue) | Standard (6") | Impassable | Impassable | 2 inches inside / blocks through | -2 | Heavy / Bunker (4+) | Fortified urban strongpoint; mouse-holing CQB. |
| Stone Wall / Rubble / Barricade | Cross at half move (3") | Impassable | Crushes wall | Blocks low LOS | -1 | Medium (5+) | Key defensive obstacles in city fighting. |
| Bunker / Log Spider Hole | Standard (6") | N/A | N/A | 2 inches (requires search) | -2 | Bunker (4+) | Immune to small arms pinning; 3 hits to destroy. |
The "Trail Rush" Mechanic (Risk vs. Speed)
- In thick jungle, troops face a constant doctrinal dilemma: hack slowly through the brush, or move quickly along existing paths and trails.
- Rule: Infantry elements moving entirely along a Sunken Dirt Trail, Path, or Cart Track may use the Trail Rush (8") move for standard movement (cost: 1 CP).
- The Ambush Hazard: While on a trail in column formation:
- If fired upon by an enemy ambush or opportunity fire, incoming shots gain +1 to Hit.
- The moving unit receives no cover save (save on 6 only)!
Convention Pacing & Scenario Deployment Standards
To ensure convention games complete strictly within 2.5 to 3 hours on standard tables (4' x 4' or 6' x 4'): 1. No "Empty Walking" Turns: Scenarios do not begin with forces on opposite edges separated by 4 feet of empty table. 2. Standard Initial Separation: Forces or starting Blinds are placed within 12" to 18" of each other at game start, guaranteeing tactical decisions and contact by Turn 1 or Turn 2. 3. Assault Insertions: Heliborne missions place landing Hueys directly onto the LZ on Turn 1; Riverine missions begin with Tango boats beached or approaching within 12" of the canal bank.
2. Environmental Friction: The "Fatigue & Heat" Mechanic
You noted: "I don't know if we want to build in any condition, like how stressed or how tired a unit is. Maybe that's too complex for a convention game, but that could be something to consider with terrain also."
Convention-Ready Solution: "The Hump" (No Micro-Bookkeeping!)
Instead of tracking individual fatigue points or tracking stamina on rosters, fatigue is triggered only by specific extreme actions:
- The Double Sprint / Mud Crossing Penalty:
- If an infantry squad chooses to Sprint (9") two turns in a row, or attempts to sprint through Flooded Rice Paddies / Mud, they become Winded / Exhausted.
- Simply flip their activation marker to Winded (or place a small green fatigue counter).
- Effect: The unit moves at half speed on its next activation and suffers -1 to Morale until they spend 1 CP to Take Five / Rest.
- Monsoon Rain (Scenario Weather Rule):
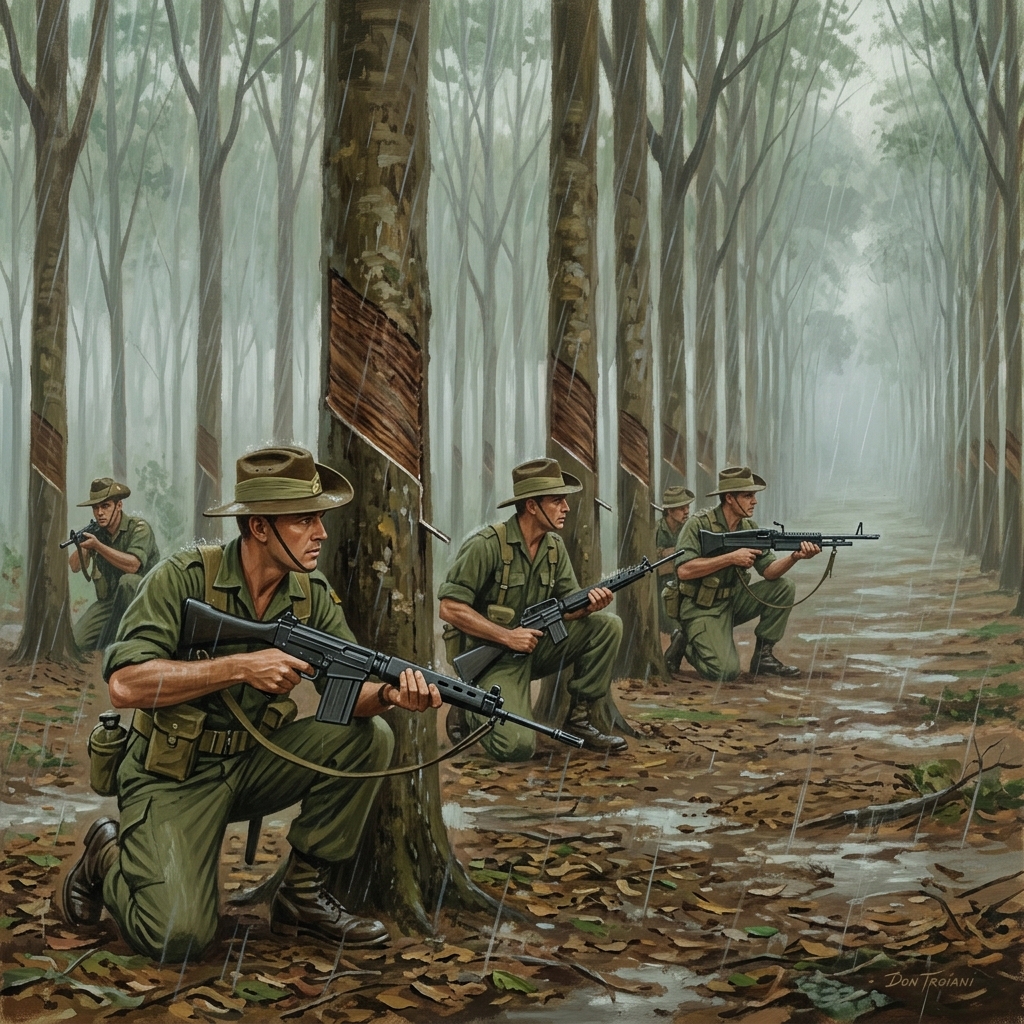
- In monsoon scenarios, maximum Line of Sight across the entire board drops to 3", and all off-board air support is grounded.
This gives the gritty feeling of carrying 60-lb packs in 100°F heat without any paperwork!
3. Asymmetric Casualties: How NVA & Viet Cong Handle Wounded
You astutely asked: "Does this also work for the opposite side, NVA/Viet Cong• If not, do we need special rules for them, or how would we address it with them• I'm thinking of a situation where some comrades go down and they just leave them and keep going."
In Vietnam, casualty evacuation was completely asymmetric:
A. The Allied Doctrine: "Leave No Man Behind"
- Operational Reality: American, ANZAC, and ARVN forces could not leave wounded comrades on the field. Doing so destroyed domestic morale and military discipline.
- Tabletop Effect:
- Every Allied Casualty Token left behind at the end of the game gives massive Victory Points to the Insurgent player (-3 VP per abandoned casualty).
- Extracting a wounded soldier via UH-1 Dustoff scores +2 Victory Points.
- Allied players are heavily incentivized to stop fighting and rescue their buddies.
B. The Viet Cong / NVA Doctrine: "Cold Tactical Calculus & Battlefield Recovery"
- Do Communist forces care about casualties•
- During the Firefight (Ruthless Pragmatism): Local Viet Cong and NVA units had strict political discipline. If an assault was underway, they did NOT stop an attack to carry a wounded buddy. Wounded soldiers were expected to crawl into cover or fire until their ammunition ran out. Comrades pressed the attack.
- After the Firefight (Denial of Intelligence / Weapons Recovery): However, the VC/NVA had a strict doctrine of retrieving weapons and bodies before breaking contact so that Allied forces could not count bodies (denying "Body Count" metrics) or capture intelligence/weapons.
The Asymmetric In-Game Rules for NVA & Viet Cong Casualties:
- No Litter Drag Penalty During Combat:
- When an NVA/VC stand takes its 2nd hit and collapses, it leaves a Communist Casualty / Weapons Token.
- Unlike US forces, NVA/VC squads do NOT have to stop and drag them during the fight! They can keep moving and shooting at full combat efficiency.
- The "Snatch & Fade" Rule:
- When an NVA/VC unit uses The Fade (disappearing into tunnels or jungle at the end of a turn), they can automatically drag any Communist Casualty Token within 4" into the tunnel with them!
- This represents them dragging off their wounded and dead comrades under cover of the jungle.
- The Intelligence / Body Count Dilemma:
- If the US player overruns an abandoned NVA/VC casualty token and captures it, the US earns +1 Victory Point (Intelligence / Captured Weapons).
- If the VC retrieves their casualty token or drags it down a tunnel, the US gets zero points for it!
4. Medics & Stabilization: Realistic Triage vs. Fantasy "Revival"
As you pointed out, real combat medics did not cast magic spells to make shot-up soldiers pop back onto the firing line.
The Role of the Medic in Dinky Dau:
- Stabilization (Halting the Bleed):
- In Phase 3, unassisted casualties roll 1D6: on a
1–2, they bleed out and become KIA (worth zero extraction VP and heavy penalties). - If a Corpsman / Medic stand is in contact with the casualty, they add +2 to the survival roll (
1only = KIA,2–6= Stabilized). The soldier is bandaged, given morphine, and stabilized for helicopter dustoff. - Treating "Walking Wounded" (Minor Dressing):
- If an active stand has a Red Casualty Ring (1 hit / degraded), a Medic in base contact can spend 1 CP to administer first aid.
- Roll 1D6: On a 5+, the injury was a flesh wound; the red ring is removed and the stand returns to full firepower! On a 1–4, the ring remains (too severe to patch under fire).
- Casualty Value & Victory Points:
- KIA (Killed in Action / Abandoned): -3 Victory Points for Allied player.
- Wounded Extracted via Dustoff (Saved): +2 Victory Points for Allied player.
- Wounded Left on Table at Game End: -2 Victory Points.
This ensures that CASEVAC is not just thematic chrome—it is a central mechanical pillar that wins or loses the game!
4. Movement Nuances & Combat Crossings
A. Crossing Streams & Muddy Canals (Fording on Foot)
- Vietnam was crisscrossed by chest-deep creeks and arroyos.
- Rule: Infantry stands can ford shallow streams at half speed (3"). While in the water, troops have zero cover (save on 6 only) and cannot fire heavy crew-served weapons (M60/mortars).
- If fired upon while in the water, any Morale test failure forces the squad to scramble backward to the bank they started from!
B. Moving Through Friendly Stands (Passage of Lines)
- In the claustrophobic confines of a 2" jungle trail, troops often need to pass through one another.
- Rule: Stands may move freely through friendly stands, provided they do not end their movement overlapping another base.
- If a unit moves through a friendly stand that is Pinned, both units must roll a Morale check (panic can be infectious in the brush!).
C. Hasty Dismount Under Fire (Bailout)
- If an M113 ACAV or truck transport takes an enemy hit while carrying troops:
- Embarked infantry must immediately execute a Hasty Bailout: roll 1D6 for each embarked stand. On a 1, the stand takes 1 Hit from spall/shrapnel.
- All survivors are placed within 2" of the vehicle hull with an orange Pinned Marker.
Chapter 4: Detection & Fog of War ("The Green Fog")
In the Vietnam theater, firefights were rarely initiated by spotting neat ranks of enemy infantry across open ground. Troops fought against sound, muzzle flashes, rustling brush, and sudden ambushes.
Dinky Dau introduces the Three-State Detection Engine:
| Step 0: Hidden Blind | Step 1: Suspected Echo | Step 2: Confirmed Contact |
|---|---|---|
| Physical Blind or Secret Reserve moves unseen along terrain. | Flips to Echo Marker when entering visual cutoff or making noise. | Revealed as Miniatures on Table upon passing a Spotting Test or firing. |
1. Line of Sight (LOS) & Jungle Cutoff Thresholds
Before any dice are rolled, physical terrain caps line of sight. If the line of sight crosses terrain, you cannot see past the listed cutoff distance:
| Terrain Type | Absolute Visual Cutoff | Spotting Modifier | Cover Save Provided |
|---|---|---|---|
| Paddy / Cleared Trail / Riverway / Open LZ | 24 inches | Flat roll (No penalty) | None (6 save) |
| Rubber Plantation / Secondary Scrub / Tall Grass | 6 inches | -1 to Spotting rolls | Medium (5+) |
| Dense Triple-Canopy / Bamboo / Hootch Interior | 3 inches | -2 to Spotting rolls | Heavy (4+) |
| Spider Hole / Concealed Bunker / Camouflaged Cache | 2 inches | Requires deliberate Search Action | Bunker (4+) |
The "Woodline Boundary" Rule: Firing Into and Out of Dense Terrain
A critical tactical question in Vietnam is how sight and fire operate when troops occupy the edge of dense vegetation (such as bamboo or triple-canopy with a 3" visual cutoff) facing an open rice paddy or clearing.
Dinky Dau resolves this using the Three Depth Bands:
| Depth Within Woodline | Position Status | Line of Sight OUT (To Open) | Line of Sight IN (From Open) | Cover Benefit |
|---|---|---|---|---|
| 0" to 1" Inside Edge | Lining the Woodline | Full Sightline: Up to 24" across open ground with zero penalty. | Visible to enemies up to 24" away in open ground. | Receives Full Cover: -1 to be hit, plus 5+ or 4+ Cover Save. |
| 1" to 3" Inside Edge | Interior Standoff | Restricted Sightline: Sight distance through brush counts toward the 3" cutoff (e.g. 2" in brush allows spotting 1" past edge). | Mutually restricted: enemies outside 1" cannot see inward. | Full Concealment. |
| Deeper than 3" | Deep Jungle Interior | Zero Line of Sight: Completely blocked to anyone outside the woodline. | Completely invisible from outside. Cannot be targeted by direct fire. | Total Jungle Concealment. |
Rule 1: Stands Positioned at the Woodline Edge (0 to 1 inch inside)
- Shooting Out: Stands placed within 1" of the terrain edge are considered "lining the woodline." They have unobstructed Line of Sight OUT into the open (up to the full 24" open terrain visual limit). They fire out with zero penalty.
- Shooting In: Enemies in the open can see stands lining the woodline up to 24" away. However, the stands in the woodline STILL receive the full terrain cover benefit (-1 to be hit, plus their 5+ or 4+ Cover Save). They are shooting from concealment behind bamboo stalks, berms, and foliage.
Rule 2: Stands Positioned Deeper Inside (1 to 3 inches inside)
- The total distance of Line of Sight traveling through dense terrain cannot exceed the terrain's cutoff (3"):
- Stand at 2 inches inside: The sightline travels through 2" of bamboo. It can see up to 1" out into the open field (2" + 1" = 3" total cutoff). If an enemy in the open is 4" away from the woodline edge, neither can see each other!
- Stand at 2.5 inches inside: The sightline travels through 2.5" of bamboo. It can only see 0.5" out past the edge (2.5" + 0.5" = 3"). Any enemy further than half an inch outside the woodline is completely invisible and cannot be targeted.
- Mutual Effect: This applies identically in both directions. If you cannot see them, they cannot see you.
Rule 3: Stands Deeper than 3 inches inside
- Any stand situated more than 3" from the woodline edge has zero Line of Sight to the outside world, and no external weapon can target them. They can only see and engage targets located within 3" inside the same dense terrain feature.
2. The Three Contact States
To recreate the psychological tension of jungle warfare, troops operate across three progressive contact states:
State 0: Blinds & Hidden Reserves
Before contact is initiated, forces maneuver unseen: * Conventional Blinds (NVA Regulars / Allied Patrols): Represented on the tabletop by marked physical discs (25–30mm chits). The opposing commander knows a force is advancing down a road or ridgeline, but the composition (infantry, machine gun team, armor) remains unknown until scouted. * "Green Ghost" Reserves (Local Viet Cong Cells): Local guerrillas, snipers, and spider holes do NOT use obvious markers on the board. They remain hidden off-board in the Insurgent player's Reserve Hand until triggered by tripwires or sprung via Ambush Tokens.
State 1: Echoes (Suspected Sound & Motion Signatures)
When a Blind is partially sensed but not positively identified, it flips to an Echo Marker (question mark chit): * Trigger 1: A friendly unit moves within the visual cutoff distance of a Blind. * Trigger 2: The Blind makes noise (sprints, crosses water, or sets off a trip flare). * Game Effect: Players know something is present (a squad, animal, or sniper), but cannot confirm identity or call targeted fire until resolved.
State 2: Confirmed Contact (Miniatures on Table)
To reveal an Echo Marker, an active friendly unit with Line of Sight must execute a Spotting Test (or the enemy reveals itself by firing or assaulting).
Higher-Level Architecture: Who Tests and How Many Dice?
- Activation Scale (The Squad Roll): In Dinky Dau, tactical activations occur at the Tactical Element / Squad level (typically 2 Medium stands, plus any attached Squad Leader or M60 weapon team).
- When a squad activates, spending 1 CP allows the entire squad as a collective group to make ONE Spotting Test.
- No Stand-by-Stand Rolling: Individual soldiers or individual stands do NOT roll separate dice. One die represents the squad's point man, scouts, and fireteam leaders scanning their sectors.
- Can a Squad Detect Multiple Hidden Enemies?
- Standard Focus: A squad nominates one primary Echo Marker to inspect per standard 1 CP Spotting action.
- Critical Spot (Natural 6): If the squad rolls an unmodified natural 6 on their Spotting Test, their keen vigilance spots a second adjacent Echo Marker within 4" of the primary target!
- Dedicated Scout Stand: If an element has an attached Scout stand or LRRP team, and successfully reveals their primary target, they may immediately make a free second Spotting Test against another Echo marker within Line of Sight.
- Can Other Units (Medics, RTOs, HQ Stands) Spot?
- Platoon HQ Stands (Officer + RTO): YES. Officers carry field binoculars and maps. An HQ stand spending 1 CP may test to spot with a +1 Leader Optics bonus.
- Isolated Specialist / Medic Stand (Small Stand):
- If a Medic or RTO is detached and moving alone, they can attempt an emergency spotting test (e.g. if they suspect an enemy creeping up on their casualty collection point).
- Encumbered Penalty: An isolated Medic or RTO suffers a -1 Spotting penalty (Medics are encumbered with medical panniers, plasma bottles, and dressings; RTOs are focused on headset tuning and antenna maintenance).
- Squad vs. Fireteam Breakdown:
- If a player splits a squad into two independent fireteams operating in separate terrain features, each independent fireteam operates as a distinct tactical element (costing 1 CP each) to test spotting in its own designated sector.
- Coordinated Platoon Sweep (Officer Leadership):
- An active Platoon Commander (Small Stand) can spend 2 CP to execute a coordinated Platoon Recon Sweep:
- Up to three separate squads within the Commander's Command Range (6", or linked by operational RTO) may simultaneously conduct a Spotting Test during that single impulse.
- Each of the three squads nominates one Echo marker in its own sector (and can trigger Critical Spots on a 6). A single Platoon Sweep can thus reveal 3 to 6 enemy markers across a 24-inch front in a single turn!
Spotting Arcs: Flanks, Sides & "Tail-End Charlie"
In Vietnam, ambushes rarely struck head-on; they hit columns from the flank and rear. Spotting tests reflect unit orientation through three distinct awareness arcs:
| Arc / Orientation | Coverage Angle | Spotting Rule | Tactical Context |
|---|---|---|---|
| Forward & Flank Arc | 180° Forward | Standard Spotting: No penalty. | Point men scan the trail while wingmen cover tree lines on both sides. |
| Rear Security Watch | Rear Arc (180°) | Designated Watch: No penalty. | Player intentionally rotates one stand to face backward ("Tail-End Charlie"), eliminating the rear blind spot. |
| Unmonitored Rear Arc | Rear Arc (180°) | -1 Blind Spot Penalty: Requires 5+ base. | If no stand was rotated to watch the rear, enemy contacts behind the direction of march are hard to spot. |
- Standard Patrol Awareness (180° Forward & Flank Arc):
- A squad moving in patrol formation has a 180° Forward Arc (covering dead ahead and 90^\circ to both left and right flanks).
- Point men watch the trail; wingmen scan the tree line to the sides. Spotting tests to the front or side flanks suffer no arc penalties.
- Posting Flank Watch or "Tail-End Charlie" (Rear Security):
- When a squad finishes moving, the player may deliberately rotate one stand to face directly toward a dangerous flank or the rear.
- That designated stand provides full, unpenalized 360° security for the squad.
- Unmonitored Blind Spot Penalty:
- If an enemy Echo marker lies within a squad's rear arc (180° behind the direction of march) and the squad did NOT post a rear-security stand:
- Attempting to spot that contact suffers a -1 Blind Spot penalty (requires 5+ base).
The Spotting Roll Procedure:
- Roll 1D6:
- Base Target: 4+ to spot.
- Modifiers (Cumulative):
- Target Moving at Sprint / Firing: +1 to Spotting roll.
- Target in Secondary Jungle / Scrub / Tall Grass: -1 to Spotting roll (requires 5+).
- Target in Dense Triple-Canopy / Bamboo / Hootch: -2 to Spotting roll (requires 6+).
- Scout / Officer with Binoculars: +1 bonus.
- Isolated Medic / RTO: -1 penalty.
- Unmonitored Rear Blind Spot: -1 penalty.
- Outcome:
- Success (4+ modified): Flip the Echo marker. If it's a Dummy chit, discard it. If it is a real enemy unit, immediately place the 15mm miniatures on the table. The spotted unit is now a Confirmed Contact and may be fired upon!
- Failure: The Echo marker remains in place. The squad saw shadows or heard rustling, but cannot obtain a positive firing solution.
3. "Recon by Fire" & Panic Firing
Troops who suspect an ambush often spray suspected tree lines before entering them. A unit with Line of Sight to an Echo Marker may declare Recon by Fire without needing a successful spotting roll:
- Ammo Consumption: The firing unit immediately takes a Low Ammo marker (they cannot use full cyclic/suppression fire until resupplied).
- Flash & Bloom: The firing unit immediately reveals its own exact location (it counts as Exposed).
- The Result Roll (1D6):
- 1: Friendly Fire / Civilian Incident! If there are civilians or friendly elements within 4" of the target marker, roll hits against them! Civic Drift score drops by -1.
- 2–3: Empty Jungle / Mirage: The marker was birds or foliage. The Echo is removed. Ammo was wasted.
- 4–5: Suppressive Hit: If the Echo is a real enemy unit, it takes 1 Pinned Marker and must test Morale to hold or slip back into a spider hole.
- 6: Direct Hit & Revealed: The Echo is immediately revealed (miniatures placed) and takes 1 casualty ring!
4. Advanced Blinds & Reconnaissance
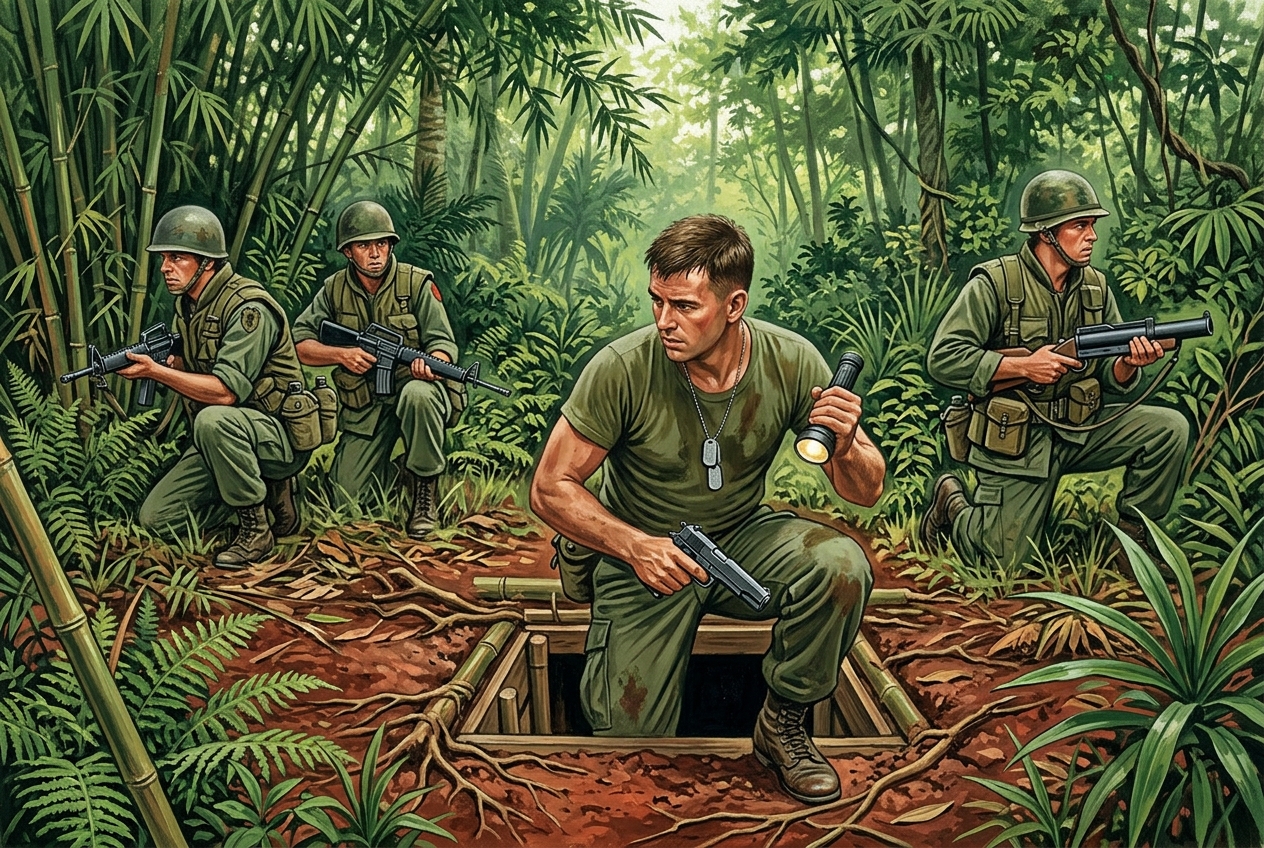
This chapter is dedicated to the mechanics of deception, blinds, stealth movement, and visual reconnaissance in Dinky Dau.
A. Why Two Blind Systems? (Symmetric vs. Asymmetric Fog of War)
Vietnam was a collision between conventional combined-arms doctrine and guerrilla stealth. Dinky Dau provides two distinct blind mechanisms:
| Feature | Large Formation Blinds | "Green Ghost" Hidden Reserves |
|---|---|---|
| Typical Users | NVA Regular Battalions, US/Allied Mechanized Columns | Local Viet Cong Cells, Snipers, Village Guerrillas |
| Tabletop Presence | Physical numbered discs or ovals on the map | Zero physical markers on table (kept off-board) |
| Known Intel | Approaching direction and speed are observable | Completely secret; location marked only by subtle trail sign |
| Deployment Trigger | Revealed by visual Line of Sight or Recon by Fire | Sprung from spider holes when player crosses ambush trigger |
2. When Do US & Allied Forces Use Blinds?
Conventional forces do not always march in the open. Free World forces use Blinds in three specific tactical contexts:
A. Australian & New Zealand (ANZAC) Jungle Patrols
- The Australian Task Force (ATF) in Phuoc Tuy province operated with extreme stealth: moving slowly off trails, maintaining strict noise discipline, and deliberately ambushing Viet Cong supply lines.
- Rule: In ANZAC scenarios, Australian squads start entirely as Blinds, giving them the ability to initiate stealth ambushes against insurgent patrols.
B. Long-Range Reconnaissance Patrols (LRRPs / MACV-SOG / Navy SEALs)
- Small elite recon elements (4–6 men) inserted deep behind enemy lines.
- Maneuver exclusively as Stealth Blinds until they fire, pop smoke, or call in extraction airstrikes.
C. Meeting Engagements (Both Sides on Blinds)
- In scenarios like Meeting Engagement in the Rubber Plantation, both the US Air Cav patrol and the NVA regular patrol start on opposite sides of the board as Blinds, racing to locate the enemy first.
3. Colored Smoke Grenades & Signaling
Colored smoke grenades were essential for ground-to-air visual communication:
| Smoke Color | Tabletop Tactical Function | Rules Effect |
|---|---|---|
| Violet / Purple | Dustoff Medevac Landing Zone | Marks touchdown zone for UH-1 medevac. Arrives next turn. |
| Yellow / Red | Airstrike Target Marking | Marks run-in target for Cobra gunships or tactical air. |
| White Smoke / WP | Screening / Concealment | Creates a 3" circular cloud that completely blocks Line of Sight for 1 turn (great for covering stretcher drags). |
| Green | Friendly Perimeter Marking | Informs pilots of friendly lines ("Do not fire south of the green smoke"). |
The "VC Smoke Spoof" (Guerrilla Deception):
- The Viet Cong frequently scavenged discarded US smoke grenades and popped them to lure allied helicopters into flak traps or cause airstrikes to drift.
- Rule: If an Insurgent unit is within 4" of an Allied smoke plume, they can spend 1 Ambush Token to pop a spoof smoke! The Allied player must pass an RTO Radio Check (4+) to verify the true smoke color, or the incoming airstrike drifts an extra 2D6"!
5. Spotting & Line of Sight (LOS) Nuances
A. The "Target in Motion" Rule
- Troops moving through jungle brush rustle bamboo, crack branches, and shift shadows.
- Rule: Any enemy unit that executed a Standard Move (6") or Sprint (9") during the current or preceding turn grants a +1 bonus to Spotting rolls against it.
- Conversely, units that were stationary and took a "Hold / Conceal" action impose an additional -1 penalty to Spotting.
B. Muzzle Flash & Cordite Smoke (Night & Heavy Canopy)
- Unsilenced automatic weapon fire creates an unmistakable visual signature.
- Rule: Any stand that fires small arms or machine guns is automatically Revealed (it flips from Blind/Echo to Confirmed Contact immediately, no spotting roll needed) to all enemy units that possess an unobstructed Line of Sight.
- At Night, firing automatic weapons without a flash suppressor creates Muzzle Bloom: that stand is treated as Illuminated until the end of the turn!
C. Elevating Sightlines: Firebases & Tree Snipers
- Firebase Berms / Watchtowers / Hilltops: Units elevated 2" or higher above table level gain an additional +6" to maximum visual cutoffs over flat terrain, but still cannot see through dense canopy from above.
- Tree Snipers: A sniper stand positioned in a tree canopy gains a 360° firing arc and Heavy Cover (4+ save), but if the stand takes an unsaved hit or suppression, it falls from the tree and is immediately eliminated!
Chapter 5: Combat & Firefights
In Dinky Dau, combat is fast, lethal, and resolved using simple pools of standard six-sided dice (D6). No complex tables or nested charts are used.
1. Shooting Procedure
When an active or reacting stand fires at a confirmed enemy target, follow these four simple steps:
| Step 1: Firepower Pool | Step 2: Roll to Hit | Step 3: Saving Throws | Step 4: Casualties & Pinning |
|---|---|---|---|
| Count weapon dice and rate of fire modifiers. | Roll D10s (Base TN 7+ to hit target in line of sight). | Target takes Cover Save (Light 5+, Heavy 4+) or Armor Save. | Failed saves inflict wounds. Any hits force a Morale Pinning check. |
Step 1: Gather Firepower Dice
Each stand contributes a fixed number of D6 based on its armament:
| Stand Type | Effective Range | Firepower Dice (FP) | Special Rules |
|---|---|---|---|
| US / Allied Rifle Stand (M16 + M79) | 8" | 4 dice | High rate of fire; lethal at close quarters. |
| NVA / VC Rifle Stand (AK-47 + SKS) | 8" | 3 dice | Rugged, reliable; assault specialists. |
| M60 GPMG Stand (Tripod/Dedicated Team) | 16" | 5 dice | Sustained fire; forces Pinning checks. |
| Soviet RPD / RPK LMG Team | 12" | 4 dice | Provides mobile support. |
| M79 Blooper / RPG-7 Anti-Tank Team | 12" | 2 dice | Bunkers/Vehicles: High Explosive (no cover save). Minimum range 2". |
| Vehicle .50 cal Browning / DShK HMG | 20" | 5 dice | Heavy suppressive fire; penetrates light cover. |
(Note: If a Medium Stand has suffered 1 casualty ring, its Firepower dice are halved, rounded up).
Step 2: Roll to Hit
Roll the collected Firepower dice. The baseline number required to hit is 4+. Apply modifiers: - Target in Medium Cover (Secondary Jungle / Hootch): -1 to hit (requires 5+). - Target in Heavy Cover / Bunkers / Spider Holes: -2 to hit (requires 6+). - Firing unit is Pinned: -1 to hit. - Short Range / Point-Blank (3" or less): +1 to hit (cannot exceed 2+).
Step 3: Cover & Armor Saves
Every successful hit is resolved by the target rolling a Saving Throw (1D6): - Infantry in Open Ground: Save on a 6. - Infantry in Light/Medium Cover (Jungle, paddies, hootches): Save on a 5+. - Infantry in Prepared Bunkers / Trenches / Spider Holes: Save on a 4+. - Armored Vehicles: Roll 1D6 against base armor save (Light: 4+, Medium: 4+, Heavy: 3+) minus the weapon's Armor Piercing (AP) value. (See Chapter 13: Vehicles & Armor).
Step 4: Apply Hits, Casualties & Pinning
- Hit Allocation Priority (The "Body Shield" Rule):
- When resolving hits against a squad with attached leaders or specialists (Platoon Commander, Squad Leader, RTO, Medic/Corpsman):
- All small-arms and machine-gun hits MUST be allocated to Medium Rifle Stands first!
- Small stands (1 HP) cannot be singled out by normal volleys while at least one Medium stand remains in coherency (2").
- Leader & Specialist Protection ("Look Out, Sir!" Check):
- If a Small Stand is hit by an explosive template (Artillery, Mortar, Claymore, RPG, Grenade), OR if all Medium stands in the squad have already been eliminated:
- Roll a "Look Out, Sir!" Test (1D6) for each hit reaching the Small Stand:
- 2–6: PASS! A nearby rifleman shoves the officer into the dirt or screams a warning; the hit is deflected or absorbed by an adjacent rifle stand.
- 1: FAIL! Direct hit! The Small Stand takes the hit (eliminated or wounded).
- The Sniper Exception: Dedicated Snipers ignore the Body Shield rule and can target Small stands directly at range.
- Stand Casualties:
- 1st Hit on Stand: Place a Red Casualty Ring (stand is wounded; fires at half strength).
- 2nd Hit on Stand: The stand is wiped out! Remove the stand from the table and place a Casualty Marker in its place (for CASEVAC rescue).
- Vehicle Penetration & Damage (1D6 Chart):
- If an anti-tank weapon penetrates an armored vehicle's save, roll immediately on the 1D6 Vehicle Damage Table:
- 1: Superficial Scrape (-1 HP)
- 2: Mobility Kill (Speed drops to 0" permanently)
- 3: Weapons Knockout (Primary weapon destroyed)
- 4: Spall & Bailout (Passengers/crew bail out Pinned within 2")
- 5: Knocked Out (Smoking wreck / Medium cover; passengers take hits on 1–3)
- 6: Catastrophic Kill (Brewed Up!) (All aboard KIA; 3 FP blast to all units within 2")
- Pinning / Suppression Check:
- If a unit takes 1 or more hits in a single attack (even if saved), it must roll a Morale Test (1D6):
- Target: 4+ (Veteran / US Marines / NVA regulars: 3+; Local militia / Conscripts: 5+).
- Failure: Place an orange Pinned Marker. Pinned units cannot move toward the enemy and suffer -1 to hit when returning fire. If already pinned, taking another failed test forces an immediate 3" retreat toward cover!
2. Close Assault (CQB in the Trenches / Bunkers)
When units close to within 2", combat becomes hand-to-hand fighting with bayonets, grenades, and point-blank bursts: 1. Defensive Fire: The defender gets one immediate reaction volley if not already Pinned. 2. Simultaneous Assault: Both sides roll their base Firepower dice; all hits land on 4+ with NO cover saves allowed! 3. Outcome: The side suffering the most casualties must immediately break and fall back 4" Pinned, or be completely eliminated if surrounded.
3. Reaction Combat: Overwatch & Opportunity Fire
When a unit holds an Overwatch Marker (set for 1 CP during its earlier activation): 1. Trigger: Enemy unit crosses its declared 90° arc within Line of Sight. 2. Resolution: Moving enemy freezes at crossing midpoint. Overwatch unit fires immediately (standard 4+ in the open, -1 to hit if fleeting through brush). 3. Effect: Targets taking hits test Morale; if failed, they take a Pinned Marker and halt in the open! Discard the Overwatch marker after resolution. 4. Suppression Breaks Sights: If a unit on Overwatch is fired upon and becomes Pinned, its Overwatch marker is immediately removed without firing.
6. Firefight Resolution Nuances
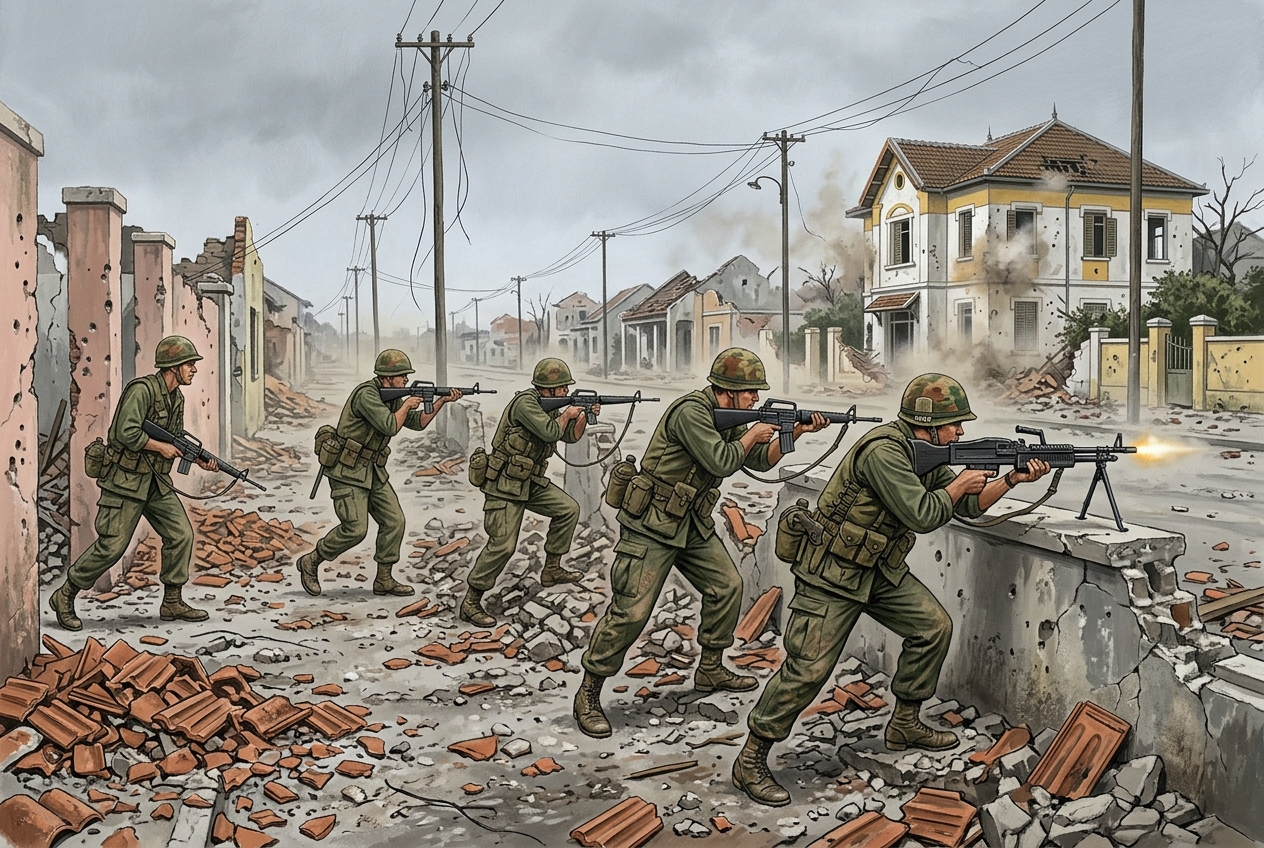
A. Point-Blank Firing & Grazing Fire
- Point-Blank Range (\le 3"): Firing at point-blank range confers a +1 bonus to Hit, and the target cannot claim cover bonuses from light scrub or bamboo.
- Grazing Fire (Machine Guns): When an M60 or DShK machine gun fires across flat, open ground (such as a rice paddy or cleared perimeter wire), draw a straight line 1" wide from the barrel to the target. Every stand (friend or foe) whose base intersects that grazing corridor must roll a saving throw!
B. Suppressive Beaten Zones (Area Fire)
- Instead of aiming at a specific identified enemy stand, a machine gun team (M60, RPD, .50 cal) can declare Area Suppression:
- Nominate a 3" circular Beaten Zone within weapon range.
- Roll 3 Firepower dice: every stand inside that circle takes an immediate Pinning Test (Morale). Even if no physical casualties are rolled, the area becomes a wall of lead!
C. Snipers & Priority Targeting
- Standard small-arms fire must be allocated to the closest visible enemy stand.
- Sniper Exception: A dedicated Sniper stand ignores the closest target rule. The sniper may choose to target Officers, RTOs, or Medics (small stands) directly, even if they are surrounded by riflemen!
7. Close Combat & Bunker Clearing (Assault Nuances)
A. The Frag Grenade Pre-Assault
- Before charging into an occupied hootch, trench, or bunker complex, an assaulting stand within 2" can spend an action to throw fragmentation grenades:
- Roll 1D6: on a 4+, the grenade lands inside! The defender immediately takes 2 Firepower dice attacks (no cover saves) and must test Morale before the physical assault begins.
B. Satchel Charges vs. Heavy Bunkers
- Concrete or heavy log-and-earth bunkers (3 HP) are impervious to rifle fire.
- An assaulting stand with a Satchel Charge (Sappers or Engineers) that reaches base contact can detonate the charge:
- Roll 1D6: on a 3+, the charge penetrates the firing slit or bunker roof, causing 3 automatic Hits, instantly collapsing the bunker!
8. Urban Breaching & Heavy Weapon Tactics (Hue City Lessons)
A. Recoilless Rifle Backblast Dust Screen & Hazard
In the narrow confines of city streets and jungle clearings, firing large recoilless rifles (M50 Ontos, 106mm M40, 90mm M67, Soviet B-10) generates a violent backblast of hot gas, cordite, and pulverized debris: 1. Backblast Hazard Zone: When fired, draw a 2" triangular cone directly behind the breech. Any friendly stand caught inside that rear cone immediately takes a 2 Firepower dice attack (save on 5+; causes Morale test for Pinning). 2. The "Dust Screen" Tactical Advantage: The concussive backblast kicks up a dense, choking cloud of dirt, brick dust, and cordite: - Place a temporary 2" x 2" Dust Cloud Marker centered behind/around the firing stand. - For the remainder of that active impulse, the dust cloud completely blocks Line of Sight through that street or corridor! - Friendly infantry elements may immediately sprint across open streets or kill zones masked by the dust without suffering enemy Opportunity Fire! The dust dissipates at the start of the next impulse.
B. "Mouseholing" (Interior Masonry Breaching)
In urban combat (such as Hue City), doors, windows, and streets are pre-registered kill zones for enemy machine guns and snipers. Marines learned to advance from room to room entirely indoors by blasting through adjoining walls: 1. Executing a Breach: An infantry stand in base contact with an exterior or interior masonry building wall can spend 1 CP to declare a Mousehole Breach using an M72 LAW, 3.5-inch rocket, or C4 satchel charge. 2. The Breach Roll (1D6): - 4+ (3+ for Sappers / Combat Engineers): A 4-square-meter hole is blown through the brick/stone wall! - On a 1–3, the wall cracks but holds; action expended. 3. Indoor Assault Surprise: - Once a mousehole is blown, the breaching squad may immediately move through the wall into the adjacent interior room. - Any enemy stand inside that room is caught by surprise: they cannot make defensive reaction fire before the simultaneous close-quarter assault!
Chapter 6: Casualties, Buddy Aid & CASEVAC
A core theme of the Vietnam War was the operational doctrine of "leaving no man behind" and the heavy tactical burden of casualty evacuation (CASEVAC). When American and Allied troops took casualties, their mission transformed immediately into defense, triage, and extraction.
1. Casualty Math: The 2-Hit Stand vs. 4–5 Figures
Understanding the Ratio:
In tactical squad combat, an entire 4–5 man fireteam is rarely wiped out simultaneously. Instead: - When a stand takes its 1st Hit, 1 soldier is struck and goes down wounded; his teammates scramble to cover him while returning fire (Red Casualty Ring: Half Firepower). - When a stand takes its 2nd Hit, the fireteam effectively collapses as an offensive combat element. The surviving 2–3 uninjured soldiers must halt their advance, drop behind cover, and tend to their dying buddies. - Therefore, when the stand takes its 2nd hit, the base is removed from the table, and a Casualty Token is placed in its spot. - The Casualty Token represents the 1 to 2 critical litter cases (stretcher wounded or KIAs). The surviving able-bodied men of that fireteam are assumed to have fallen back into the squad perimeter to provide local security.
2. Buddy Aid: "The Litter Drag"
When a stand collapses and leaves a Casualty Token: - A healthy friendly stand can spend an action to link up with the token and become a Litter Team. - Effects of Carrying Casualties: - The carrying stand cannot shoot. - Its movement is reduced to 3" per move (carrying or dragging a stretcher through jungle mud and brush). - Tactical Reality: A single ambush inflicting two casualties immediately ties up the entire squad in rescue and drag operations, bringing offensive maneuvers to an immediate halt!
2. The Bleed Rule (Triage)
During Phase 3 (Consolidation) of every turn: - Any unattended Casualty Token left exposed in the field without a buddy or Medic in base contact must roll for survival: - Roll 1D6: - 1–2: KIA (Killed in Action). Casualty cannot be saved; scores victory points against the Allied player. - 3–6: Clinging to Life. Remains as a critical casualty token awaiting evacuation. - Corpsman / Medic Benefit: If a designated Medic stand is in contact with the casualty, add +2 to the survival roll, and the casualty is considered stabilized.
3. Dustoff: Helicopter Medevac Procedure
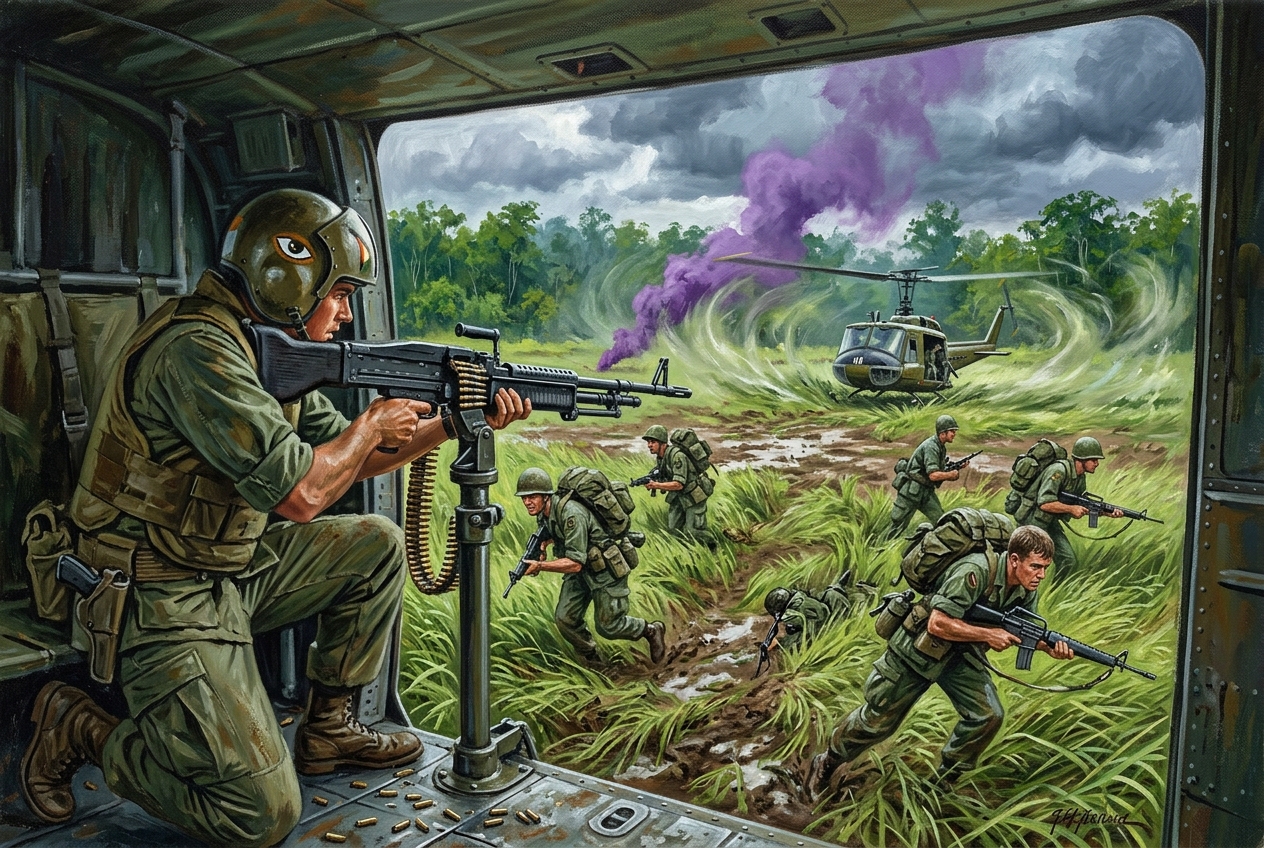
To evacuate casualties off the battlefield, the Allied player can call in a UH-1 "Dustoff" Medevac:
| Step 1: Secure the LZ | Step 2: Pop Smoke | Step 3: Touchdown & Loading | Step 4: Dustoff Extraction |
|---|---|---|---|
| Clear a 6" flat area free of active enemy presence. | Pop purple or violet smoke to verify the landing corridor. | Medevac slick lands for 1 impulse; load stabilized litters. | Helicopter departs board; scores full scenario victory points! |
- Designate a Landing Zone (LZ):
- Must be a reasonably clear opening (at least 6" in diameter free of dense trees/buildings).
- Pop Smoke:
- A stand at the LZ spends 1 CP to throw a colored smoke grenade (place a Smoke Marker).
- Calling the Dustoff initiates a 1-turn arrival clock.
- Dustoff Touchdown & Hot LZ Check:
- At the start of the next turn, the UH-1 model touches down on the smoke marker.
- Hot LZ Ground Fire: If any unsuppressed enemy unit has Line of Sight to the helicopter within 12", the enemy gets an immediate free reaction shot against the chopper (Roll 1D6):
- 1: Driven Off / Waved Off: Pilot aborts touchdown; helicopter returns to orbit.
- 2–4: Fuselage Scratches: Aircraft undamaged; loading proceeds.
- 5: Co-Pilot / Turbine Hit: Helicopter lands damaged; can extract casualties but must leave immediately and cannot return.
- 6: Helicopter Shot Down / Crash! The chopper crashes in the LZ, creating burning wreckage and 2 additional casualty markers!
- The "Blue Max" Cobra Escort Cross (ARA Suppression):
- If the Allied player has an active Gunship (AH-1G Cobra or UH-1C Hog) on station, the attack helicopter executes the historical "nose-cross maneuver," slicing low across the slick's nose to suppress the woodline with flechettes and miniguns.
- Tactical Benefit: Enemy ground fire suffers a -2 penalty to the Hot LZ roll (a roll of 5 drops to 3; only a natural 6 can threaten the aircraft!).
- Immediate Retaliation: Any enemy stand that reveals itself to fire on the Dustoff is immediately strafed by the escort Cobra with a free 4 Firepower dice reaction volley!
- Extraction:
- Any litter teams in contact with the chopper load their casualties.
- The helicopter departs, securing full victory points for saving those soldiers!
Chapter 7: Vehicles, Armor & Anti-Tank Warfare
In Vietnam, armored fighting vehicles and gunboats served as mobile firebases, jungle battering rams, and convoy escorts. However, dense vegetation, mud, and widespread proliferation of RPGs and shaped charges made armor operating without infantry support extremely vulnerable.
1. Armor Classes & Weapon Vulnerability
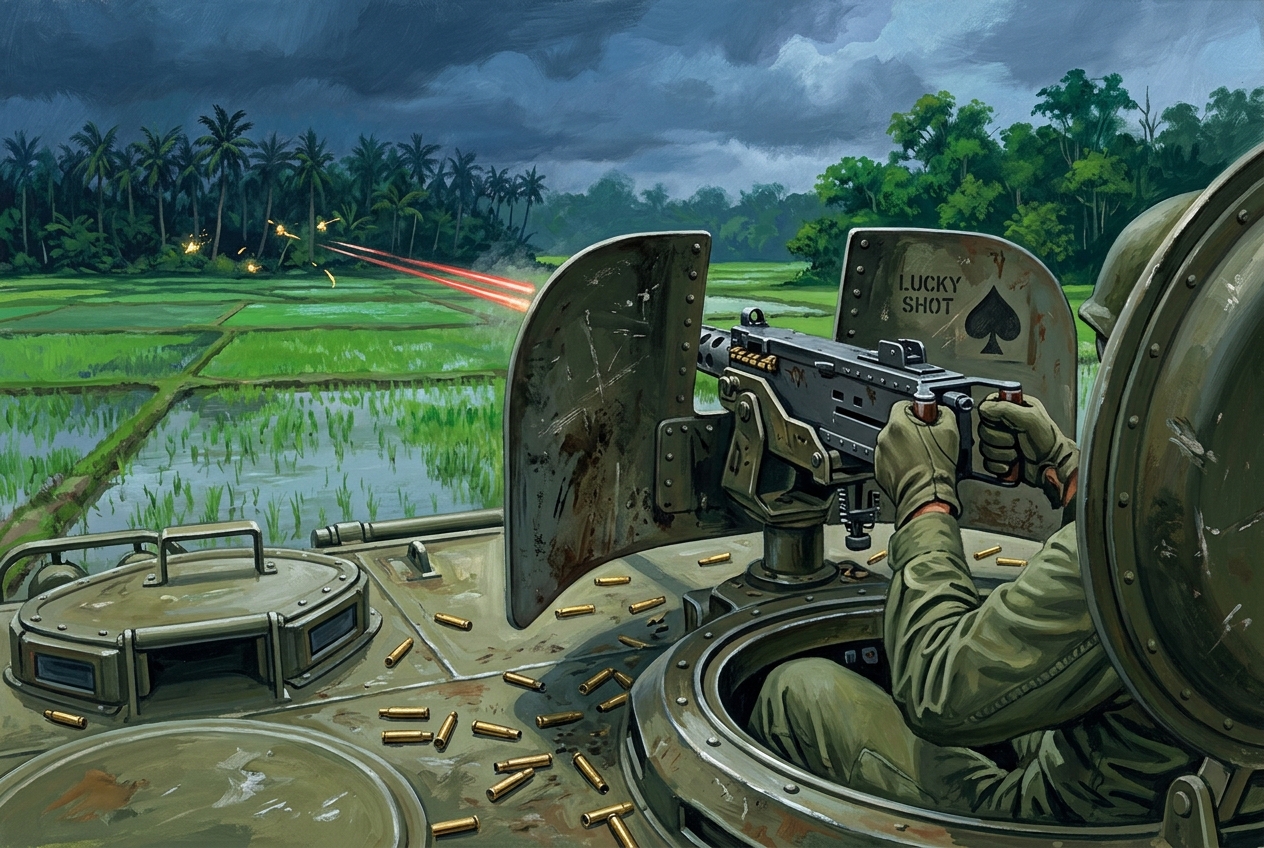
Vehicles are divided into four Armor Classes:
| Armor Class | Typical Vehicles | Small Arms Immunity | Base Armor Save | Notes |
|---|---|---|---|---|
| Class 1: Thin-Skinned | Jeeps, Light Trucks, PBR Boats | No (Rifles can harm) | 6 only | Vulnerable to automatic rifle fire and shrapnel. |
| Class 2: Light Armor | M113 ACAV, M551 Sheridan, PT-76, BTR-50 | Yes (Immune to small arms) | 4+ | Aluminum or thin steel; easily penetrated by RPGs. |
| Class 3: Medium / Reinforced | M41 Walker Bulldog, Tango Boat (Bar Armor) | Yes (Immune to small arms) | 4+ (or AP Red.) | Standoff bar armor degrades shaped charges. |
| Class 4: Heavy Armor | M48A3 Patton, Type 59 / T-54 Tank | Yes (Immune to small arms) | 3+ | Heavy cast steel; impervious to light anti-tank fire. |
Small Arms vs. Armored Vehicles:
- Standard small arms (M16, AK-47, SKS, M60, RPD) cannot damage Class 2, 3, or 4 armored hulls.
- Exposed Cupola Gunners / Pintle Crews: If a vehicle has an exposed gunner or commander operating a pintle .50 cal or M60, an opposing infantry stand may choose to target the exposed crewman. The vehicle crew must roll a Morale test: on a failure, the gunner is "buttoned up" (cannot fire the pintle weapon until the vehicle spends 1 CP to unbutton).
2. Anti-Tank Weapons & AP Values
Shaped-charge warheads and high-velocity anti-tank guns use an Armor Piercing (AP) rating that directly reduces the target's armor saving throw:
| Anti-Tank Weapon | User Faction | Effective Range | Firepower Dice | AP Value | Special Rules |
|---|---|---|---|---|---|
| RPG-2 Team | VC / NVA | 8" | 2 dice | AP 1 | Early war warhead; minimum range 2". |
| RPG-7 Team | VC / NVA | 12" | 2 dice | AP 2 | High-velocity rocket; lethal shaped charge. |
| M72 LAW (Disposable) | US / Allied | 8" | 2 dice | AP 1 | Carried by riflemen (1 shot per squad per game). |
| M67 90mm / M40 106mm RCL | US / ARVN | 20" | 3 dice | AP 3 | Recoilless rifle; backblast reveals position. |
| 76mm Tank Gun (M41 / PT-76) | ARVN / PAVN | 24" | 5 dice | AP 2 | High velocity kinetic / HEAT round. |
| 90mm Gun (M48A3 Patton) | US / USMC | 36" | 6 dice | AP 3 | Heavy gun; Canister option against infantry. |
| 100mm Gun (T-54 / Type 59) | PAVN / NVA | 36" | 6 dice | AP 3 | Soviet main battle tank gun. |
| Heavy Anti-Tank Mine | VC / NVA | Trap trigger | Automatic | AP 4 | Detonates under track; No save for light armor. |
[!NOTE] Bar Armor & Slat Screens (Tango Boats & ACAVs): Slat bar armor or chain-link RPG standoff screens reduce the AP of incoming shaped-charge warheads (RPG-2 and RPG-7) by -1 AP!
3. Anti-Tank Attack & Penetration Procedure
When firing an anti-tank weapon at a vehicle:
| Step 1: Roll to Hit | Step 2: Vehicle Armor Save | Step 3: Damage Resolution |
|---|---|---|
| Standard targeting roll based on weapon range and sightline. | Target compares Armor Value (AV) minus weapon Penetration (AP). | Unsaved penetrating hits roll on the 1D6 Vehicle Damage Table. |
- Roll to Hit: Base target is 4+ (modified by cover and movement).
- Vehicle Armor Save: Roll 1D6. Subtract the weapon's AP value from the vehicle's base save:
- Example 1: An M113 (Base save 4+) hit by an RPG-7 (AP 2) needs a 6 to save (4 + 2 = 6).
- Example 2: An M48A3 Patton (Base save 3+) hit by an RPG-7 (AP 2) needs a 5+ to save (3 + 2 = 5).
- Penetration: If the armor save fails, the round has breached the armor! Roll immediately on the Vehicle Damage Table.
4. The Unified 1D6 Vehicle Damage Table
| Roll (1D6) | Damage Result | Tabletop Effect |
|---|---|---|
| 1 | Superficial Spall / Hull Scrape | The armor absorbed the brunt of the jet. The vehicle loses 1 Hull Point, but all mobility and weapons remain fully functional. |
| 2 | Mobility Kill (Track / Wheel Blown) | Track snapped or transmission shattered. Speed drops to 0" permanently. Vehicle acts as a stationary pillbox. Hull loses 1 HP. |
| 3 | Weapons Knocked Out | Main gun barrel cracked, cupola jammed, or coax feed sheared. The vehicle's primary weapon is destroyed for the rest of the game. Hull loses 1 HP. |
| 4 | Spall Shock (Emergency Bailout!) | Internal spall and toxic smoke fill the crew compartment. Hull loses 1 HP. All embarked passengers and crew must immediately bail out, placed within 2" of the hull with an orange Pinned Marker. |
| 5 | Knocked Out (Burning Wreck) | Vehicle is destroyed. Hull loses all remaining HP. Roll 1D6 for each embarked stand: on a 1–3, the stand suffers 1 Hit. Replace model with a smoking marker; counts as Medium Cover (Wreck). |
| 6 | Catastrophic Kill (Brewed Up!) | Direct hit to fuel or main gun ammo rack! The vehicle detonates in a massive fireball. All crew and passengers are immediately eliminated! All stands within 2" suffer 3 Firepower blast hits! |
4.1. Tank Crew Concussive Fatigue ("Punch-Drunk" Armor)
Even when RPG-7 or B-40 shaped charges fail to penetrate the thick cast-steel armor of tanks (such as the M48A3 Patton or T-54), the concussive shock waves ringing through the steel hull inflict severe acoustic and mental disorientation on the crew. In Hue City, Marine commanders reported that tankers emerging from prolonged ambushes were completely "punch drunk":
- Trigger Condition: If an armored vehicle survives 2 or more non-penetrating hits from anti-tank weapons (RPGs, LAWs, Recoilless Rifles, or HE shells) in a single turn:
- The Concussion Test: The vehicle crew must immediately roll a Crew Morale Test (4+):
- Pass (4+): The crew grits their teeth, clears their vision, and maintains fire discipline.
- Fail (1–3): The crew is Stunned / Punch Drunk! Place a yellow Stunned Marker on the vehicle.
- Tabletop Effect:
- A Stunned vehicle may move, but cannot fire its main gun, coaxial weapons, or cupola guns during its next activation.
- The vehicle commander can remove the Stunned Marker by spending 1 CP to Rally the Crew (or passing a Morale check at the end of the turn in Phase 3).
5. Master Vietnam Common Vehicle Roster
A. US & Allied Common Vehicles
| Vehicle Name | Faction | Speed & Type | Base Armor | HP | Primary Armament | Transport Capacity |
|---|---|---|---|---|---|---|
| M113 ACAV | US Army, ARVN, ROK | 6" (Tracked) | Light (4+) | 3 | Shielded .50 cal (5 FP) + two side M60s (4 FP each) | 1 Squad (2 stands) |
| M113 Standard APC | US Army, ARVN | 6" (Tracked) | Light (4+) | 3 | Pintle .50 cal (5 FP) | 2 Squads (4 stands) |
| M48A3 Patton Tank | US Army, USMC, ARVN | 5" (Heavy Track) | Heavy (3+) | 4 | 90mm Gun (6 FP, AP 3, Canister) + Coax + Cupola .50 | None |
| M41 Walker Bulldog | ARVN | 6" (Light Track) | Medium (4+) | 3 | 76mm Gun (5 FP, AP 2) + Pintle .50 cal (5 FP) | None |
| M50A1 Ontos | US Marine Corps | 6" (Light Track) | Light (5+) | 2 | 6× 106mm RCL (8 FP volley, AP 3; 1 reload per game) | None |
| V-100 Commando | US Military Police, ARVN | 8" (Wheeled) | Light (5+) | 2 | Twin .30 cal or .50 cal turret (4 FP) | 1 Stand (Patrol team) |
| M551 Sheridan | US Army (11th ACR/25th ID) | 6" (Tracked) | Light (5+) | 3 | 152mm Gun (Canister 6 FP, HE, AP 3) + Pintle .50 | None |
| Gun Truck (5-ton) | US Army Logistics | 6" (Wheeled) | Steel (5+) | 3 | Twin/Quad .50 cals or minigun (7 FP) | None |
| PBR Mk II (River Boat) | US Navy (Brown Water) | 10" (Water) | Thin (6 save) | 2 | Twin .50 cal bow (6 FP) + M60 waist + .50 aft (4 FP) | 1 Patrol Team |
| Tango Boat (LCM-6 ATC) | US Navy / 9th ID Riverine | 6" (Water) | Bar Armor (3+) | 4 | 20mm Cannon (5 FP) + two .50 cals + bar-armor screens | 1 Platoon (6 stands) |
B. Communist (PAVN / NVA) Common Vehicles
| Vehicle Name | Faction | Speed & Type | Base Armor | HP | Primary Armament | Transport Capacity |
|---|---|---|---|---|---|---|
| PT-76 Amphibious Tank | PAVN / NVA (1968, 1972) | 6" (Track/Water) | Light (4+) | 3 | 76mm Gun (5 FP, AP 2) + Coax 7.62mm (3 FP) | None |
| Type 59 / T-54 Tank | PAVN / NVA (1972 Easter Off.) | 5" (Heavy Track) | Heavy (3+) | 4 | 100mm Gun (6 FP, AP 3) + 12.7mm DShK AA gun (5 FP) | None |
| BTR-50P Amphibious APC | PAVN / NVA (1968, 1972) | 6" (Track/Water) | Light (4+) | 3 | Pintle 7.62mm or 12.7mm DShK (4 FP) | 2 Squads (4 stands) |
| BTR-152 Wheeled APC | PAVN / NVA | 6" (Wheeled) | Light (5+) | 2 | Pintle 7.62mm SG-43 (3 FP) | 2 Squads (4 stands) |
| ZPU-2 / ZPU-4 Gun Truck | PAVN / NVA | 6" (Wheeled) | Thin (6 save) | 2 | Twin/Quad 14.5mm AA Guns (6 FP, heavy suppression) | None |
6. Dismounting Under Fire & Transport Logistics
- Mounting / Dismounting: Costs 1 CP (or 1 impulse). Troops can mount or dismount up to 2" from the vehicle hull.
- Passenger Vulnerability: If a vehicle suffers a Mobility Kill or Weapons Knockout, passengers inside are unaffected. If a vehicle suffers Emergency Bailout (Roll 4) or Knocked Out (Roll 5), embarked stands take emergency hits and dismount Pinned. If it suffers Brewed Up (Roll 6), all embarked stands perish.
Chapter 8: Fire Support & Aviation
Fire support is a dominant element of the Vietnam War. However, in our game: 1. Artillery is strictly off-board (105mm/155mm howitzers and naval guns fire from miles away, not placed alongside infantry on a 4'×4' tactical table). 2. Realistic Time Delays & In-Game Calibration: In real life, plotting fire missions could take anywhere from 5 to 30 minutes, or much faster if a battery was already laid on a registered target. In Dinky Dau, where each turn represents ~2–3 minutes of combat, off-board support operates on a 1-to-2 Turn Delay Clock. 3. If a scenario doesn't warrant it, leave it out! For small meeting engagements or patrol clashes, restricting heavy artillery keeps the game focused on infantry maneuvering.
1. Fire Support Assets Overview & Historical Vectoring
How Air Support Was Actually Directed:
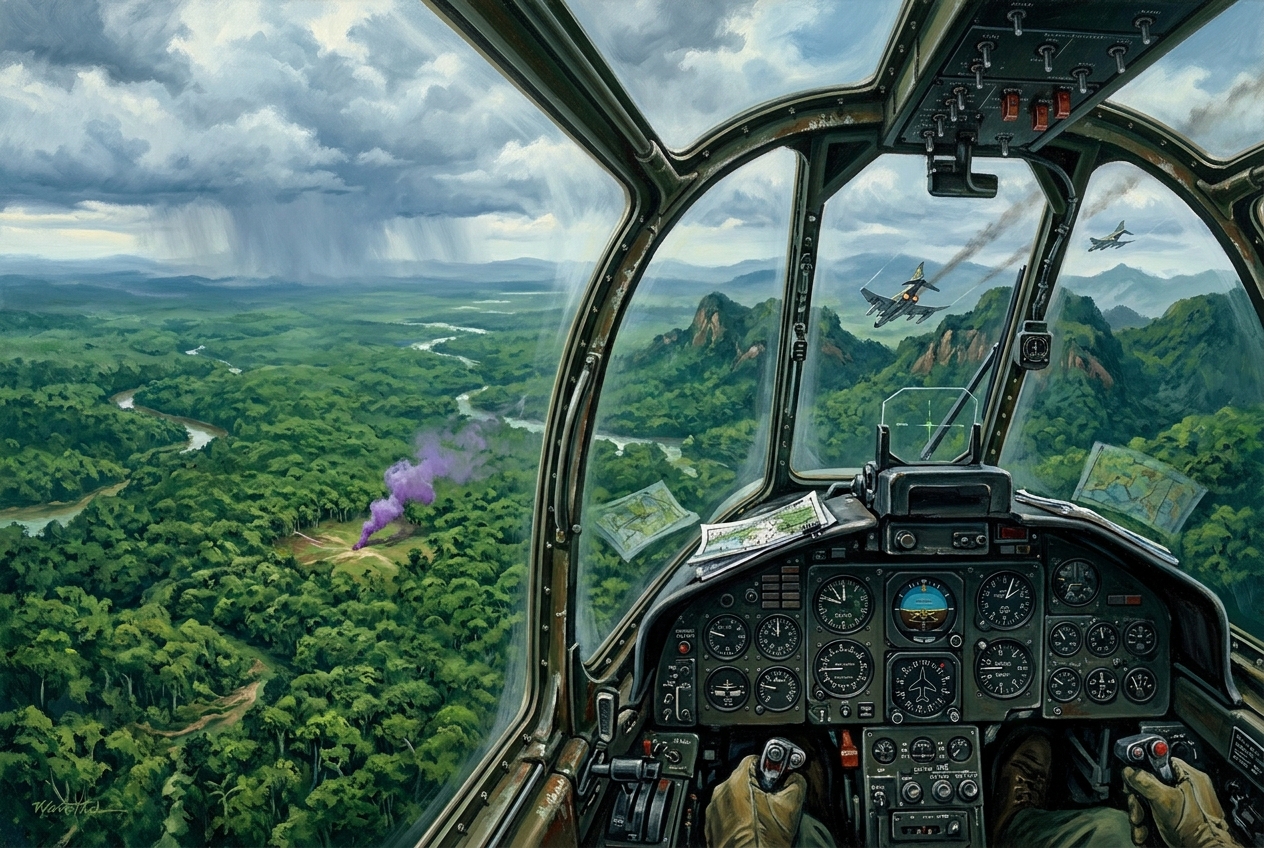
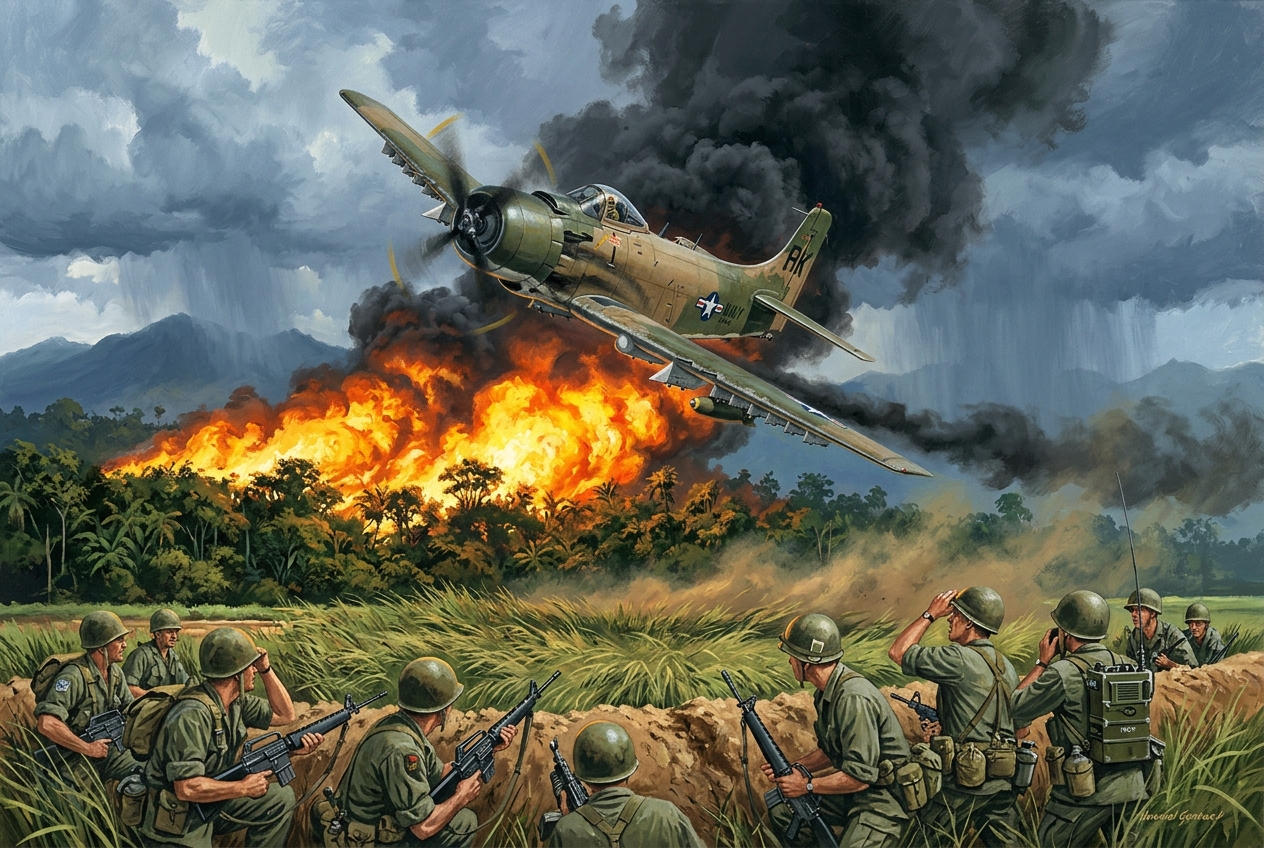
In Vietnam, strike aircraft and helicopter gunships did not attack randomly. Close Air Support (CAS) was tightly coordinated: - Marking the Target: Ground troops popped a colored smoke grenade (e.g., violet, yellow, red). The Forward Air Controller (FAC) in an O-1 Bird Dog or O-2 Skymaster verified the smoke color with the ground RTO. - Run-In Axis (Heading): The ground commander or FAC assigned a specific heading designed to fly parallel to friendly troop lines (never directly toward friendly positions) to avoid short bomb drops or rockets falling into friendly perimeters. - Gunships (AH-1 Cobra / UH-1C): Followed tracer rounds or clock directions called by the platoon leader.
In Dinky Dau, the player designates the attack heading arrow. Historical friction is modeled via the Pass Deviation Roll (1D6) (winds, flak, canopy smoke can cause the strafe to fall short, long, or yaw by 45°).
| Asset Type | Availability | Call-in Delay | Blast / Strike Area | Lethality & Rules |
|---|---|---|---|---|
| On-Board Light Mortar (60mm) | Organic to Platoon | Instant (same turn) | 2" circle | 3 dice at 4+ to hit; indirect fire over trees; ignores light cover. |
| Off-Board Heavy Mortar (81mm / 82mm) | Battalion asset | 1 Turn Delay | 3" circle | 4 dice at 4+; causes Pinning on all units under template. |
| Off-Board Field Artillery (105mm / 122mm) | Division / Firebase | 2 Turn Delay (1 turn if Pre-Registered) | 4" circle | 6 dice at 3+; destroys wooden hootches; no cover saves. |
| Aviation: AH-1 Cobra / UH-1 Gunship | On-call helicopter | 1 Turn Delay | 1.5" x 6" strafing corridor | Minigun & Rocket pods: 8 dice at 4+ to hit along run-in axis. |
| Tactical Air: F-4 Phantom / A-1 Skyraider (Napalm) | Corps asset | 2 Turn Delay | 2" x 8" fiery corridor | Obliterates jungle canopy; ignites terrain; catastrophic morale checks. |
2. The Fire Mission Procedure
| Step 1: Call & Plot | Step 2: Delay Clock | Step 3: Scatter & Drift | Step 4: Impact Resolution |
|---|---|---|---|
| Spotter nominates target coordinates and pops smoke. | Set flight delay timer (1 to 2 turns for arty, 2 to 3 for jets). | Roll 1D8 clock direction and 1D6" (or 2D6") drift distance. | Place blast template at impact point; resolve lethal blast and shock. |
Step 1: Call and Plot Target
- A designated Forward Observer (FO), Officer, or RTO with Line of Sight to the target location spends 1 CP to request fire.
- Place a Target Marker / Smoke Marker on the chosen spot.
- If the spotter has no Line of Sight (blind coordinates called over map), mark the call as Unobserved.
Step 2: The Delay Clock
- Set a small D6 die next to the marker showing the delay number (e.g., "2" for a 105mm battery).
- At the start of each Tension Phase, reduce the die by 1.
- When it reaches 0, the fire mission impacts!
Step 3: Drift / Scatter Check
Vietnam's thick canopy, crosswinds, and deceptive terrain caused severe shell drift: - Roll 1D6 for Scatter: - 1–2 (Direct On-Target): Rounds impact right on the target marker! - 3–6 (Drift): Roll a Scatter Die (or D8 directional clock) and drift the template 1D6 inches in that direction. - Unobserved Penalty: If the spotter lacked direct line of sight, drift is 2D6 inches! - Danger Close: If the drift brings the template within 4" of friendly stands, your own troops take incoming fire!
Step 4: Detonation & Blast Resolution
- Place the circular blast template over the final impact point.
- Every stand (friend or foe) whose base is touched by the template takes the listed Firepower dice attacks.
- Units surviving the blast must immediately take a Morale test or become Pinned.
Chapter 9: Special Operations & Environment
1. Weather & Time of Day
In Southeast Asia, operations were dictated by the tropical monsoon cycle and the relentless cycle of light and shadow. Battles like Hue City, the Ia Drang Valley, and firebase night probes had distinct environmental footprints.
1. Time of Day Mechanics
Time of day directly alters Line of Sight (LOS), spotting certainty, and the effectiveness of night flares.
| Time of Day | Base Spotting / LOS Cap | Spotting Roll Modifier | Special Tactical Effects |
|---|---|---|---|
| Full Daylight | Terrain Dependent (up to 24") | Standard (4+) | Full aviation and artillery accuracy. |
| Dawn / First Light | Max 12 inches across open ground | -1 to Spotting | Mist burns off gradually; night blinds transition into confirmed contacts. |
| Dusk / Twilight | Max 8 inches across open ground | -1 to Spotting | Muzzle flashes visible (+1 to spot firing units); shadow aids the guerrilla player. |
| Night (Pitch Black) | Max 3 inches (Point-Blank) | -2 to Spotting | Complete night fog of war. Movement on trails is normal, brush is halved. Requires Illumination. |
Night Combat & Battlefield Illumination:
- Trip Flares:
- Free World perimeters and ambushes can place hidden Trip Flare Tokens on trails or perimeter wire.
- If an enemy stand or blind moves within 2" of the marker, the flare triggers: the area within a 6" circle is immediately illuminated for the rest of the turn (LOS becomes standard daylight within that circle, and moving units lose cover bonuses).
- Mortar & Artillery Illumination Shells ("Star Shells"):
- Any on-board 60mm mortar or off-board battery can spend an action to fire an Illumination Round instead of High Explosive.
- Place a 6" circular Illumination Template over the target area. All units under the light can be spotted as if in daylight!
- Muzzle Flash Bloom:
- At night, any stand that fires automatic weapons without a flash suppressor immediately becomes Illuminated / Exposed until its next activation.
2. Weather & Monsoon Conditions
Weather can either be chosen by the scenario designer or rolled on the Tropical Weather Table (1D6):
| Roll (1D6) | Weather State | Visibility & Movement Effects | Aviation & Fire Support Effects |
|---|---|---|---|
| 1–3 | Clear & Sweltering Heat | Normal terrain rules apply. Double-sprint fatigue risk ("The Hump"). | All air strikes, Cobras, and artillery fully operational. |
| 4 | Morning Ground Mist / River Fog | Open ground capped at 12"; burns off at the start of Turn 3. | Fast mover jets cannot drop napalm until fog lifts. Cobras operational. |
| 5 | Tropical Downpour (Monsoon) | Maximum board-wide LOS capped at 6". Flooded paddies and mud everywhere. | All fixed-wing aviation grounded; helicopters must test for wave-off on 4+. Artillery drift doubled. |
| 6 | Violent Monsoon Storm | Maximum board-wide LOS capped at 3". Infantry movement cut in half everywhere! | ALL air support and Dustoff helicopters grounded. Artillery unobserved. |
2. Riverine Operations
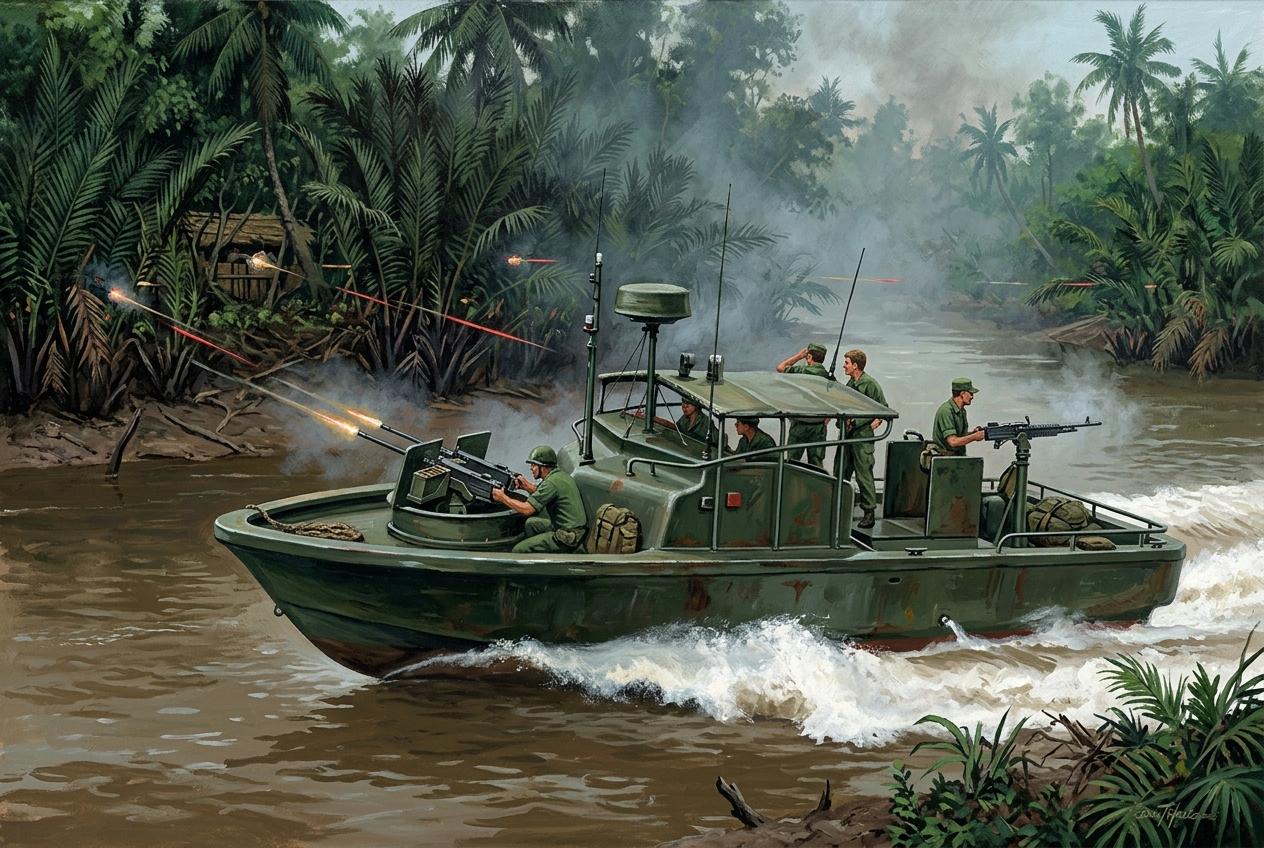
During the Vietnam War, the Mekong Delta and the Rung Sat Special Zone featured over 3,000 miles of waterways, canals, and mangrove swamps. The Mobile Riverine Force (MRF)—a joint endeavor of the US Navy’s Task Force 117 and the US Army’s 9th Infantry Division—created an entirely new doctrine of warfare.
1. Riverine Craft Profiles & Watercraft Mechanics
Riverine craft operate under specific naval rules that differ from terrestrial vehicles:
| Craft Type | Base / Model Scale | Top Speed | Armor / Durability | Armament & Firepower | Special Naval Capabilities |
|---|---|---|---|---|---|
| PBR Mark II (Patrol Boat River) | 1 Hull (~3.5" long) | 14 inches (Waterjets) | Light Hull (2 Hits) (Fiberglass + Ceramic shields) | Forward Tub: Twin .50 cal (6 dice) Aft: Single .50 cal (5 dice) Port/Starboard: M60s (3 dice each) |
High Maneuverability: Can turn 180° in place; shallow draft; radar surface detection. |
| ATC "Tango" Boat (Armored Troop Carrier) | 1 Hull (~6" long) | 8 inches | Heavy Armor (3 Hits) (Steel hull + Bar armor) | Forward: 20mm Cannon / Mk 19 (6 dice HE) Turrets: 4 × .50 cal / M60 (5 dice each) |
Troop Transport: Carries up to 1 full rifle platoon (6 stands). Drops forward ramp for beach assaults. |
| "Monitor" (The River Battleship) | 1 Hull (~6" long) | 6 inches | Heavy Armor (3 Hits) (Heavy bar armor) | Bow Turret: 40mm Bofors or 105mm Howitzer (6 dice HE) Midships: 20mm cannons |
Fire Support: Direct/indirect fire support from the water. Can lay down smoke corridors. |
| CCB (Command & Control Boat) | 1 Hull (~6" long) | 8 inches | Heavy Armor (3 Hits) | 20mm cannon, .50 cals | Naval C2: Grants +2 Command Points to Allied player while operational. |
| Sampan / Motorized Wooden Junk (VC) | 1 Stand (1–2" boat) | 6 inches | Fragile (1 Hit) | Small arms (3 dice) or hidden RPG / Mine | Stealth: Can maneuver as a Blind or disguise as peaceful civilian traffic. |
2. Waterway Navigation, Currents & Bank Assaults
Canal Geography:
- Main Rivers (Wide): 8" to 12" wide open water corridor. Sightlines are unrestricted along the river axis.
- Canals & Arroyo Cuts (Narrow): 3" to 5" wide. Dense mangrove roots, nipa palms, and mud banks enclose both sides, cutting visibility off the water to 3 inches into the foliage.
Beaching & Debarkation Procedure:
- The Approach: The Tango boat moves along the canal to the chosen embankment.
- Dropping the Ramp (Action: 1 CP):
- Place the lowered ramp model touching the canal bank.
- Troops inside debark directly onto the bank, moving up to 4" into the brush.
- Shoreline Mud Hazard:
- Troops exiting the ramp onto unpaved muddy banks roll for Mud (difficult terrain: 3" move max on their first turn unless secured by engineers).
3. Asymmetric Riverine Hazards: Mines & RPG Ambush Nests
The Viet Cong operated "Water Sapper" battalions (Dac Cong) trained to destroy allied watercraft:
1. Water Mines (Command-Detonated & Floating):
- The Insurgent player can place 1 to 2 hidden River Mine tokens in canal choke points during setup.
- When an allied boat crosses within 2" of the marker, the insurgent can spend 1 Ambush Token to detonate:
- Mine Detonation (1D6):
- 1–2: Premature blast; water geyser, boat rocked (Pinned/Stunned for 1 turn).
- 3–5: Direct Hull Breach! Boat takes 1 Hit; any embarked troops must roll Morale.
- 6: Catastrophic Mine Kill! PBR is sunk instantly; Tango boat takes 2 Hits and is beached!
2. Shoreline RPG "Spider Bunkers":
- Insurgents build concealed log-and-earth bunkers right at the waterline, camouflaged under nipa palms.
- Bunkers have line of sight down the canal axis and are immune to light small arms fire (4+ cover save).
- Firing an RPG-2/RPG-7 at a boat from within 6" gains +1 to Hit due to the boat's large surface area!
Chapter 9: Guerrilla Warfare: Tunnels, Booby Traps & Village Pacification
This chapter governs the three foundational mechanics of asymmetric insurgent warfare: underground tunnel complexes, lethal booby traps, and civilian population dynamics.
1. Booby Traps & Tripwires
Viet Cong local forces inflicted up to 15% of all American casualties in Vietnam through improvised explosive devices (IEDs) and primitive mechanical booby traps.
Placement & Triggering:
- Before the game starts, the Insurgent player secretly notes the location of 2 to 4 Booby Trap Tokens (or places face-down numbered chits on trails, hootch doorways, or rice paddy bunds).
- Trigger: Whenever an Allied stand moves along a marked path or enters a trapped hootch, the trap is triggered!
- Roll 1D6 on the Booby Trap Hazard Table:
| Roll (1D6) | Trap Type | Tactical Effect |
|---|---|---|
| 1 | Spotted in Time! | Alert point-man spots the tripwire or disturbed soil. Trap is disarmed; no casualties. |
| 2 | Punji Stick Pit / Toe Popper | Sharpened bamboo stakes or small buried cartridge. Point stand takes 1 Light Hit (Red Casualty Ring); unit's movement immediately halts. |
| 3 | Grenade on a Tripwire | Chinese Type 67 grenade rigged between bamboo stalks. Explosive blast hits point stand with 3 Firepower dice at 4+ to hit. |
| 4 | Bouncing Betty / Claymore Mine | Upward-bounding fragmentation mine. Hits the triggering stand AND all friendly stands within 2" with 4 Firepower dice (no cover save). |
| 5–6 | Command-Detonated Artillery Shell | Salvaged unexploded 105mm/155mm US shell detonated via wire by a hidden observer. Catastrophic blast! 3" circular template: 6 Firepower dice at 3+ to hit; destroys nearby light vehicles and thatch hootches! |
2. Underground Tunnels & Spider Hole Complexes
The Cu Chi and Iron Triangle tunnel complexes allowed entire VC companies to live, plan, and vanish underground.
Tabletop Tunnel Mechanics:
- Tunnel Entrance Markers:
- Represented by small 20mm camouflaged hatch markers.
- Requires an active Allied stand within 2" to pass a Search Test (4+) to detect.
- Underground Movement:
- Any unpinned Insurgent stand in base contact with a Tunnel Entrance can spend an action to Enter the Tunnel. The miniatures are removed from the board into the player's Reserve.
- On a subsequent turn, the unit can emerge from ANY other linked tunnel entrance on the table, springing a surprise attack in the Allied rear!
- Tunnel Rat Exploration & Destruction:
- An Allied player who discovers a tunnel entrance can designate an infantryman as a "Tunnel Rat" (entering with a pistol and flashlight) or spend an action to drop a CS Gas Grenade or Satchel Charge.
- Destroying the Tunnel (Action: 1 CP): Place a demolition charge. Roll 1D6: on a 3+, the tunnel entrance is permanently collapsed and unusable for the rest of the game!
3. The Civic Drift Engine (Village Pacification)
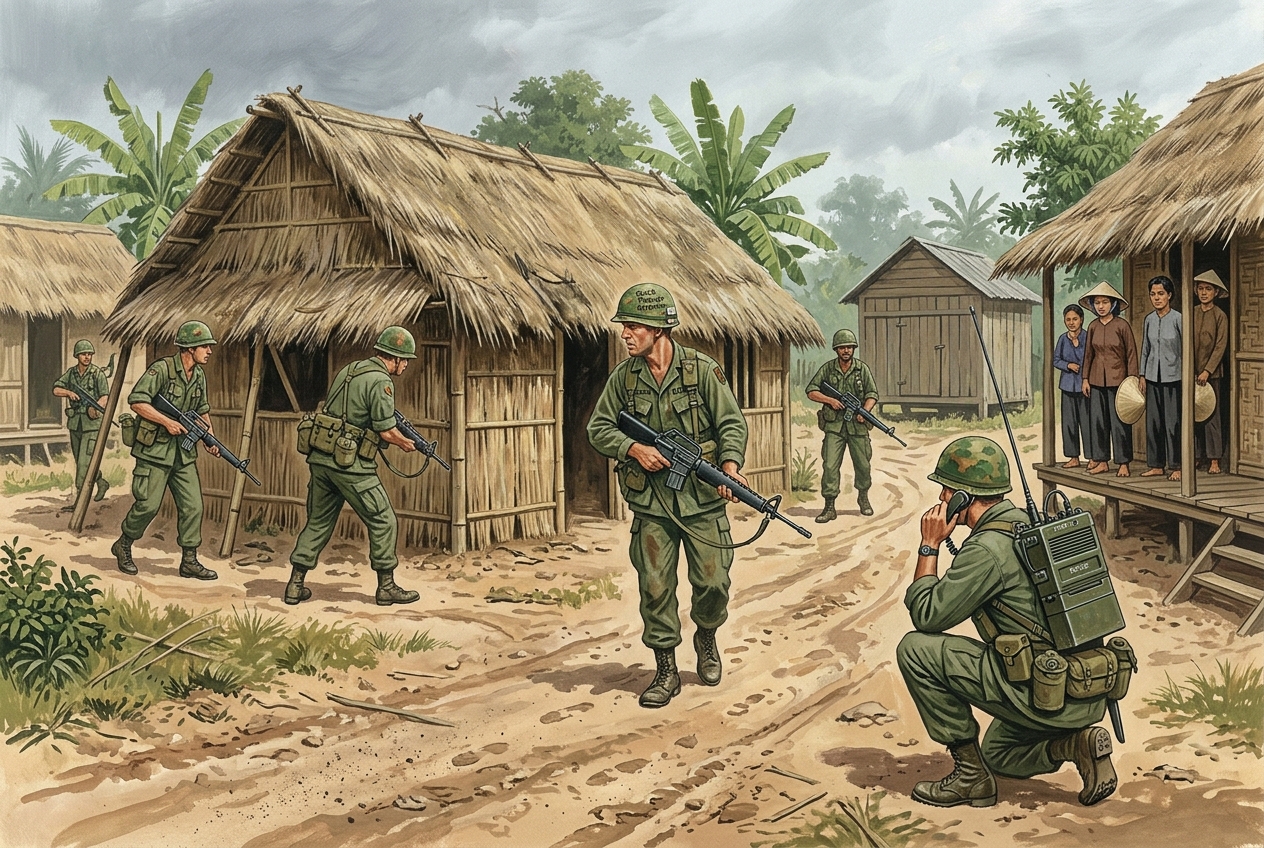
In civilian hamlets, victory is not won purely by body counts. Destroying a village to "save it" alienates the local population, turning neutral peasants into active combatants.
The Civic Drift Track (-5 to +5):
The game tracks hamlet loyalty on a five-tier continuum starting at Neutral (0):
| Loyalty Rating | Classification | Tabletop Tactical Effect |
|---|---|---|
| +3 to +5 | Cooperative Hamlet | Villagers secretly warn patrols of booby traps (+2 detection); automatically reveal 1 VC Dummy Blind each turn. |
| 0 to +2 | Neutral / Wary | Standard searching rules apply. Searching a thatch hootch takes 1 full tactical action. |
| -1 to -3 | Hostile / Alienated | Villagers act as lookouts for the VC; Insurgents gain +1 to Ambush reaction rolls. |
| -4 to -5 | Open Revolt | Local militia joins the fight! Any unsearched hootch immediately spawns 1 VC Local Guerrilla stand (3 FP dice). |
| Civic Score | Hamlet Status | Board Tactical Effect |
|---|---|---|
| +3 to +5 | Cooperative Hamlet | Villagers secretly point out booby traps (+2 to detect traps); automatically reveal 1 VC Dummy Blind per turn. |
| 0 to +2 | Neutral / Wary | Standard searching rules apply. Searching a hootch takes 1 full action. |
| -1 to -3 | Hostile / Alienated | Villagers act as spotters for the VC; Insurgents gain +1 to Ambush initiative rolls. |
| -4 to -5 | Open Revolt | Local militia joins the fight! Any unsearched hootch spawns 1 VC Local Guerrilla stand (3 FP dice). |
Triggers for Civic Drift Adjustments:
- Negative Drift (Allied Penalties):
- Firing heavy artillery, mortars, or napalm within 6" of a village: -2 Drift.
- Burning or destroying a thatch hootch without finding contraband: -1 Drift per hootch.
- Causing civilian casualties during Recon by Fire: -3 Drift.
- Positive Drift (Allied Rewards):
- Medic spends an action to treat injured villagers ("Medcap Mission"): +1 Drift.
- Discovering and securing an enemy rice or weapons cache without harming homes: +2 Drift.
Chapter 10: Solo & Co-Op AI Engine ("The Jungle Ghost")
Dinky Dau is built from the ground up to support immersive solitaire and cooperative play. In the Vietnam theater, conventional forces rarely faced an enemy deployed in plain sight across an open field; they patrolled into the unknown against hidden traps, fleeting sound signatures, and sudden violent ambushes.
This chapter provides the Automated Insurgent Engine, allowing one or more players to command an Allied patrol, air assault, or sweep against a dynamic, automated Viet Cong / NVA enemy with zero bookkeeping.
1. Core Principles of the Solo Engine
- No "God-View" Omniscience: The player does not know which markers are real, which are booby traps, and which are harmless jungle noise until they scout, search, or trigger them.
- Zero Paperwork / Fast Resolution: The AI uses a simple 1D6 Reaction Matrix and logical priority flowcharts. No cards, apps, or complex state tracking required.
- True Asymmetry: The AI behaves like historical guerrillas—hugging friendly forces close to negate artillery, ambushing from flanks, and vanishing into tunnels before heavy firepower can be brought to bear.
2. Table Setup & The "Shadow Blind" Generation
Step 1: Placing Shadow Blinds
Before the player deploys, the table is seeded with Shadow Blinds (numbered 25mm–30mm markers face down): * 4' × 4' Table: Place 6 Shadow Blinds. * 6' × 4' Table: Place 8 Shadow Blinds. * Placement Priority: 1. One blind inside each designated Hamlet Hootch or bunker. 2. One blind along each prominent tree line or jungle woodline. 3. The remaining blinds are scattered across brush patches or paddy bunds (roll 1D6 for table quarter if unsure).
Step 2: The Insurgent Threat Level
At the start of the game, establish the scenario Threat Level (determines how aggressive and well-armed the AI is): * Level 1: Local Guerrilla Militia (Village self-defense, crude traps, ancient rifles). * Level 2: VC Main Force Company (Standard balanced game; AK-47s, RPGs, spider holes). * Level 3: NVA Regular Battalion / Dac Cong Sappers (Elite assault cells, heavy bunkers, coordinated envelopments).
3. Automated Detection & The AI Ambush Trigger
The automated detection sequence follows three clear phases:
| Phase | Tabletop Condition | Automated AI Resolution |
|---|---|---|
| 1. Sound & Motion | Player unit moves within visual cutoff of an AI Blind | The Blind immediately flips to an Echo Marker. |
| 2. Inspection | Player declares a Spotting Action (1 CP) against the Echo | Player rolls 1D10 Spotting Test against terrain target number. |
| 3. Contact Reveal | Spotting Test passes (or Ambush Trigger met) | Roll on the 1D6 Contact Reveal Table to deploy actual miniatures! |
The Ambush Reaction Roll:
Whenever a player stand moves within Trigger Distance (6" in open/scrub, or 4" in dense jungle/bamboo) of an Echo Marker, roll 1D6 immediately: * Roll 1–2: The Spider Waits. The guerrillas hold their fire, waiting for more troops to enter the kill zone. The Echo marker remains in place; no reaction. * Roll 3–6: "AMBUSH!" The trap is sprung! The AI immediately interrupts the player's move. Proceed directly to the Contact Reveal Table.
4. The 1D6 Contact Reveal Table
When an Ambush is triggered (or when a player successfully passes a Spotting Test against an Echo marker), roll 1D6 on the table matching the scenario's Threat Level:
| Roll (1D6) | Level 1: VC Local Militia | Level 2: VC Main Force | Level 3: NVA Regulars / Sappers |
|---|---|---|---|
| 1 | False Alarm / Mirage: Birds or bamboo creaking. Discard marker. | False Alarm / Mirage: Animal rustle. Discard marker. | Booby Trap! Grenade tripwire! Firing stand takes 2 FP blast (no save). |
| 2 | Punji Stake Pit: Lead stand takes 1 Hit; Morale test to avoid Pinning. | Booby Trap / Toe Popper: Lead stand takes 1 Hit; unit Pinned. | Sniper in Tree: 1 Stand (1 FP), shoots at Officer/Medic directly! |
| 3 | Sniper / Lookout: 1 Stand (SKS carbine, 2 FP). Fires and holds. | Sniper & Spotter: 1 Stand (3 FP, ignores screening). Fires. | Assault Cell: 2 Medium Stands (AK-47s, 6 FP total). |
| 4 | Guerrilla Cell: 1 Medium Stand (SKS/Mosin, 3 FP). | Assault Cell: 2 Medium Stands (AK-47s, 6 FP total). | Heavy Assault Cell: 2 Medium Stands + RPD LMG (10 FP total!). |
| 5 | Guerrilla Cell + Trap: 1 Medium Stand (3 FP) + Punji pit. | Assault Cell + RPG-7: 2 Medium Stands + RPG team (8 FP, AP 2). | Bunker / Heavy MG: Fortified Log Bunker (3 HP) with 12.7mm DShK (5 FP). |
| 6 | Major Ambush! 2 Medium Stands (6 FP) sprung in flank! | Reinforced Cell & Bunker: 2 Medium Stands + Log Bunker with RPD. | Elite Dac Cong Sappers: 2 Sapper Stands (8 FP, Satchel Charges, elite 3+ Morale)! |
5. Automated Combat Behavior Flowchart (Phase 2 Impulses)
When the automated AI activates a revealed insurgent unit during Phase 2, evaluate this 4-step tactical decision ladder in order:
| Step | Tactical Condition | Automated AI Action |
|---|---|---|
| 1. Pinning Check | Is the AI unit Pinned? | Roll Morale Test (4+). If passed, remove the Pinned marker. If failed, retreat 3" into deepest available cover. Activation ends. |
| 2. Close Assault | Is an enemy stand within 2" (CQB range)? | Declare Close Assault! Charge into base contact and resolve simultaneous CQB combat. |
| 3. Ranged Firefight | Does the AI have Line of Sight to an enemy? | Open Fire! Roll full Firepower dice pool against the highest-priority target (see priority table below). |
| 4. Flank Maneuver | No targets in Line of Sight? | Advance! Move 6" toward the nearest player flank or unpinned player unit. |
AI Target Priority Hierarchy:
When an AI unit shoots, it selects targets according to this strict doctrine:
| Priority Rank | Target Type | Tactical Rationale |
|---|---|---|
| Priority 1 | Player Stand in the Open (No Cover) | Exploit exposed troops with maximum lethal firepower. |
| Priority 2 | Troops Performing Buddy Aid / Litter Drag | Disrupt casualty evacuation and pin rescue teams. |
| Priority 3 | Closest Visible Player Stand | Standard direct engagement. |
| Special | Snipers Always Target Small Stands | AI Snipers ignore rank and file; they target Officers, RTOs, or Medics directly! |
6. The Automated "Fade" & Reinforcement Engine (Phase 3)
Guerrillas do not fight pitched battles against overwhelming firepower. In Phase 3 (Consolidation):
1. The Disengagement Check:
Every active AI infantry stand on the table tests to Fade: * Condition: If the AI stand is Unpinned and located within 4" of a jungle edge, hootch, or tunnel entrance: * Roll 1D6: On a 3+, the stand Fades! * Snatch Wounded: The fading stand automatically picks up any Communist Casualty Token within 4" and drags it into the jungle. * Tabletop Removal: Remove the AI miniatures from the table. * Regeneration: Place a new Shadow Blind on the opposite jungle board edge or in an unsearched hootch! The guerrillas have slipped through tunnels to strike from another direction!
2. The "Clinging to the Belt" Aggression Rule:
- If an AI stand is within 3" of a player stand, it will NOT Fade.
- It remains locked in close combat ("hugging the enemy's belt") to deliberately prevent the player from calling in off-board artillery or napalm strikes!
7. Solitaire Escalation: The "Doom Clock" (Turn Limit Friction)
To prevent a solo player from crawling cautiously across the board for 20 turns, the solo engine uses an escalating Tension Clock:
| Game Turn | Tactical Escalation Effect |
|---|---|
| Turn 1–2 | Standard Patrol: Standard spotting and threat rolls. |
| Turn 3 | Guerrilla Alert: AI gains +1 to Ambush Reaction rolls (ambushes trigger on 2–6). |
| Turn 4 | Mortar Harassment: At the start of Phase 1, roll 1D6: on a 5+, an off-board 82mm mortar salvo strikes the center of the player's formation (3 FP blast, causes Pinning). |
| Turn 5 | Jungle Encirclement: The Insurgents deploy 2 new Shadow Blinds directly on the player's rear table edge (cutting off the retreat path!). |
| Turn 6 | Final Contact: Relief helicopters arrive or ammo runs dry. Calculate final Victory Points. |
8. Cooperative Play Guidelines (2 to 4 Players)
In Co-Op mode, players fight together against the AI engine: 1. Platoon Shared Pool: * One player serves as the Platoon Commander (controls the HQ stand and rolls the master Command Point pool). * Each player commands one distinct Squad (or vehicle/heavy weapons attachment). 2. Impulse Coordination: * During the player impulse, the team decides collectively which squad activates and spends from the shared CP pool. * Encourages authentic tactical dialogue: "Do we spend 1 CP to rush the M60 up to lay down overwatch, or do we spend it on the medic to stabilize Bravo team's point man- 3. Shared Casualty Burden: * All players share the same Victory Point tally. Leaving a wounded buddy behind costs the entire team -3 VP!